ZARİF ATELIER
TWO CAPES, ONE SIZE
Two winter capes from your own pattern: warm burgundy and warm camel
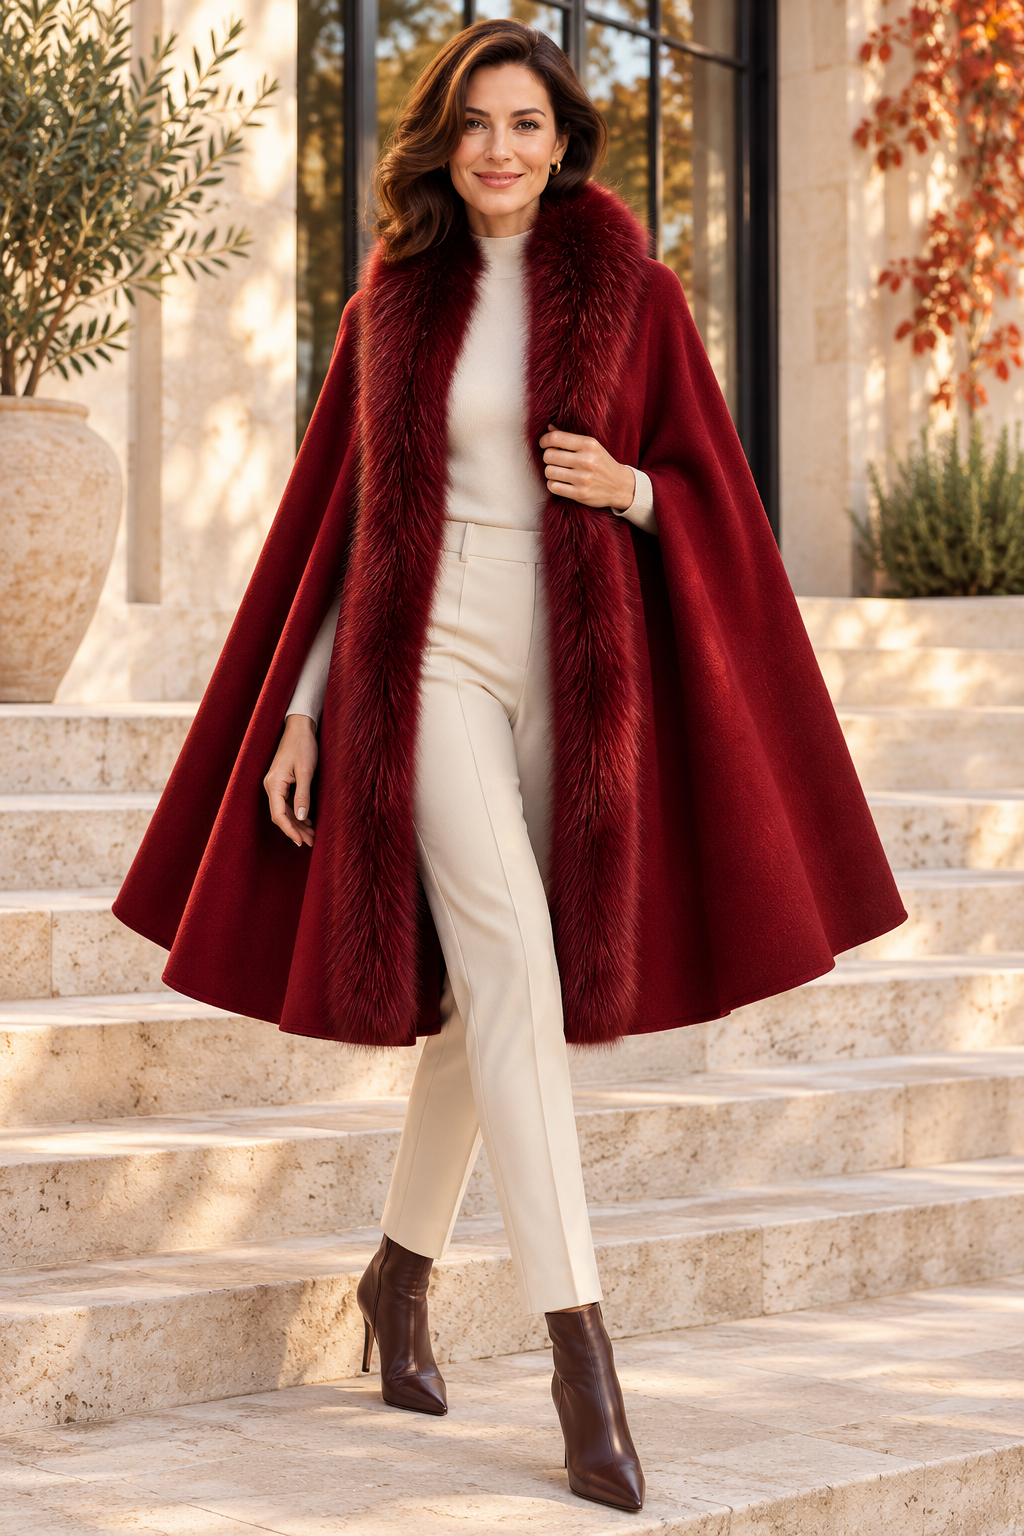
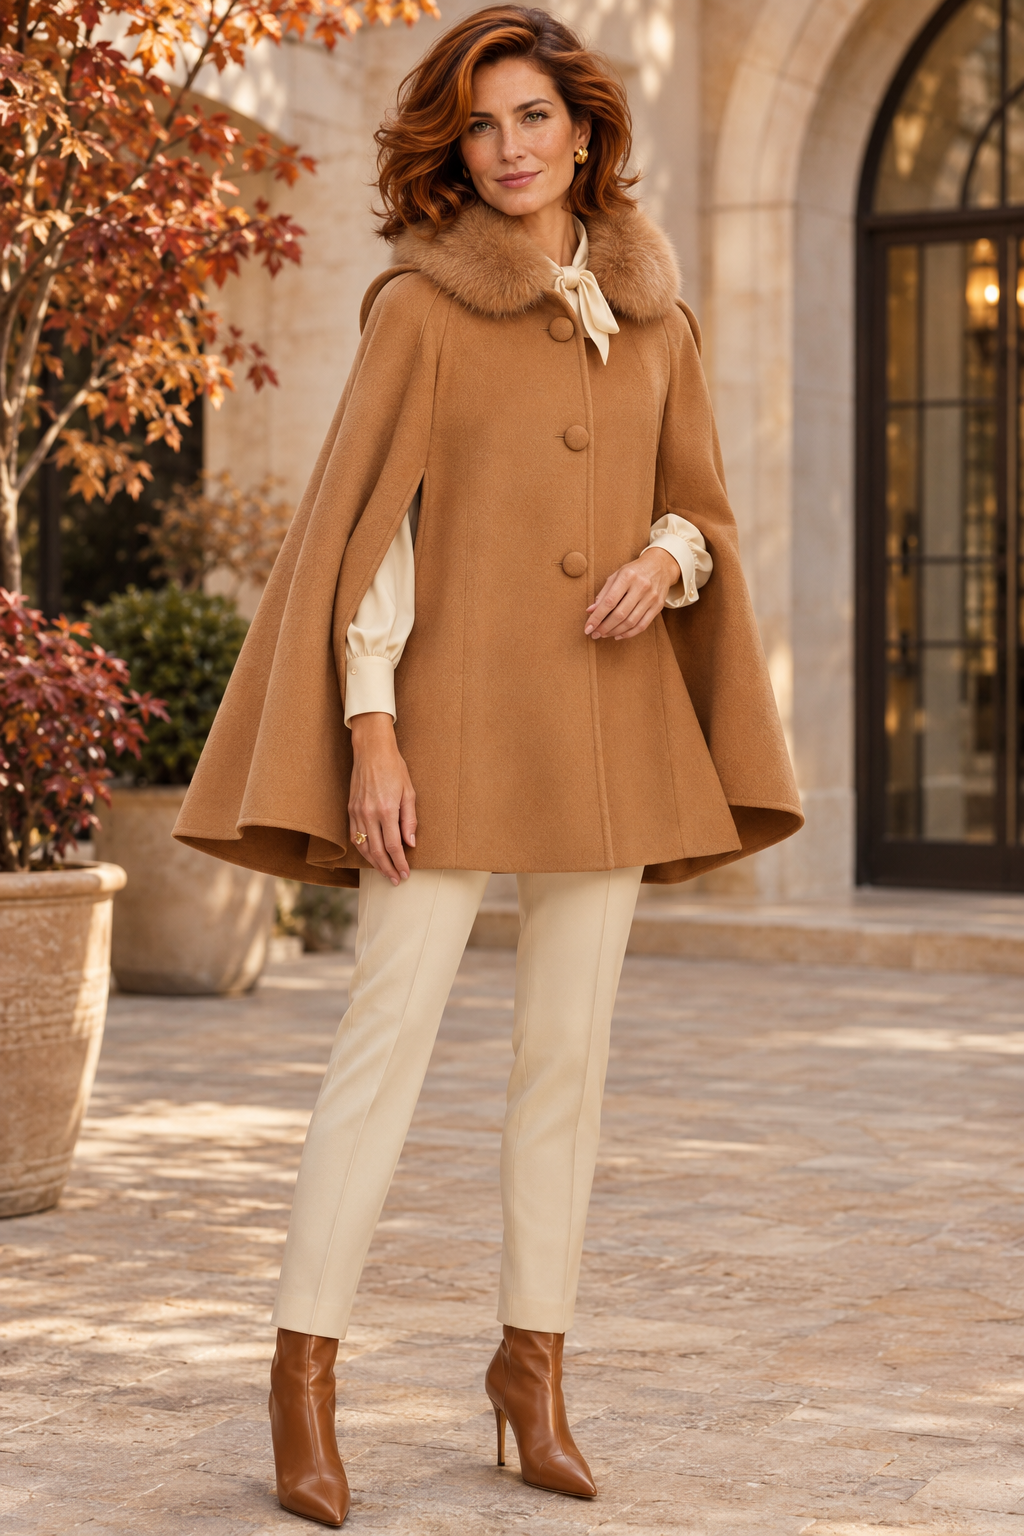
November at its most beautiful is a warm fabric draped over your shoulders.
This month in the Atelier we are sewing two capes. One is warm burgundy, open at the front, with a fur strip in the same tone running its full length. The other is warm camel, with fabric-covered buttons and a soft fur collar at the neck.
Both are one size. A cape is made not to fit the body but the shoulders and the length; that is why the same pattern works from size 38 to 46. The only measurement that changes is the length, and you will choose it from the small table below.
Neither is easy, nor is either difficult. Once you have learned to work with thick wool and to sew fur, you can make a new one every winter.
PART 1 · MODEL A · OPEN BURGUNDY CAPE (WITH A REMOVABLE FUR STRIP)
Model: open at the front, no buttons, half-circle cut, no armholes. The arms come out through the front opening. The fur strip running from neck to hem attaches and detaches with hooks; so the cape can be worn with or without fur.
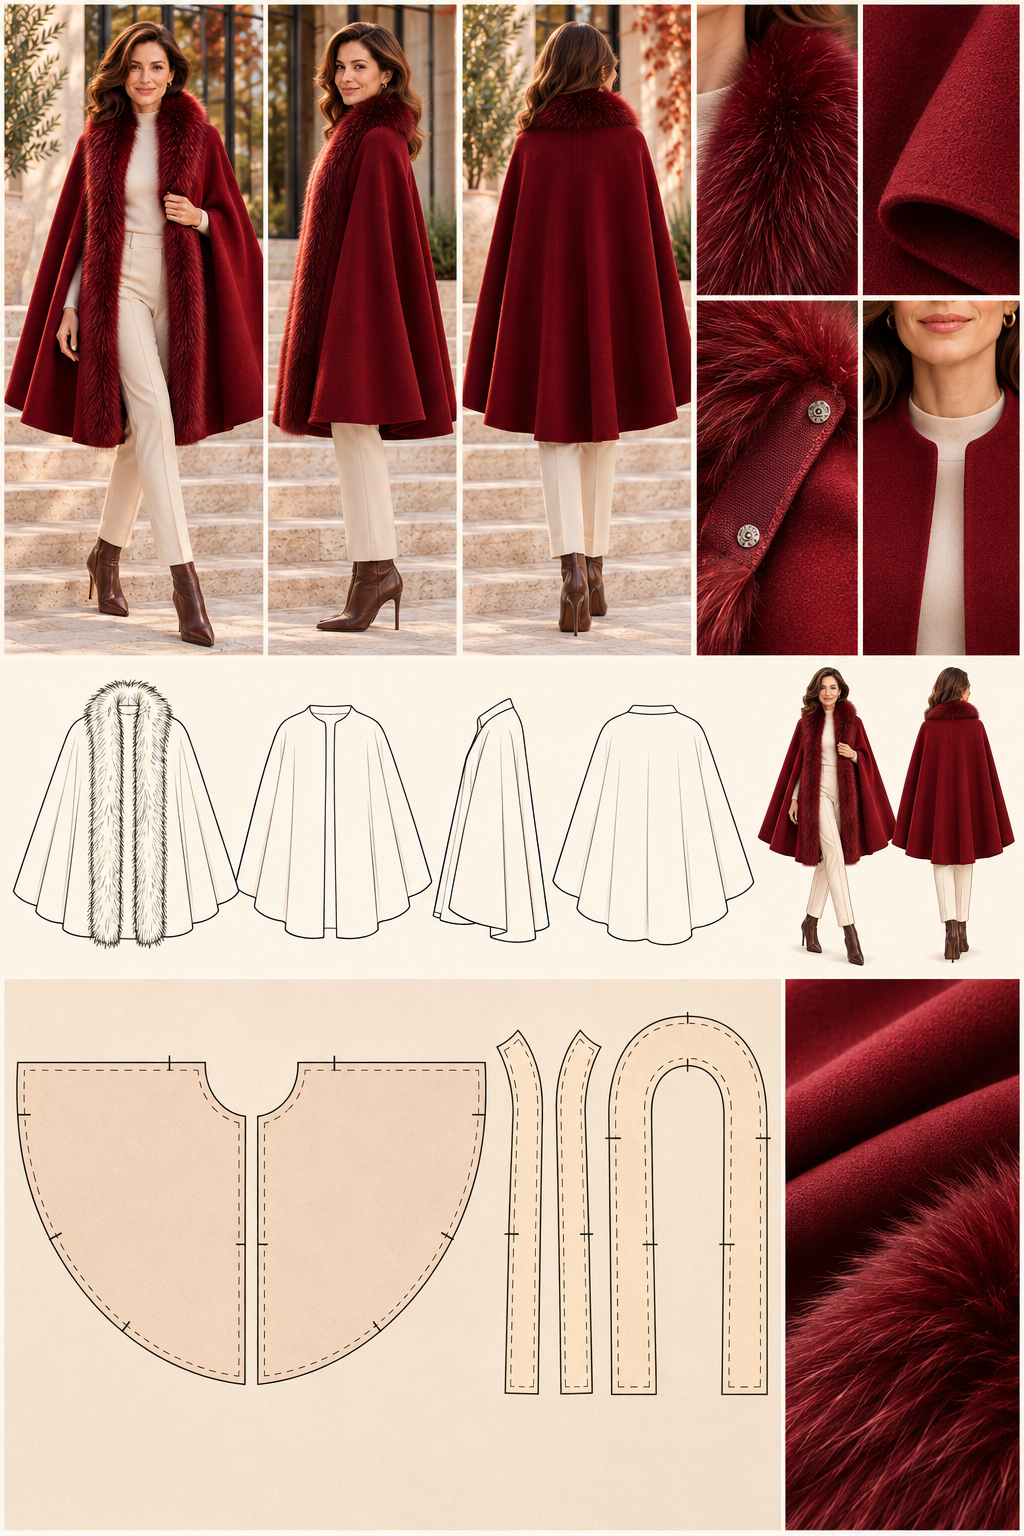
MATERIALS (back length 95 cm, below the knee)
– Thick wool-cashmere fabric, warm burgundy, 150 cm wide: 2.4 m
– Lining (Bemberg or satin viscose), burgundy, 140–150 cm wide: 2.4 m
– Long-pile faux fur in the same burgundy tone as the cape, 150 cm wide: 1.3 m
– Hooks and eyes, small, nickel: 28 sets (26 + 2 spare)
– Burgundy grosgrain ribbon for the loops, 1 cm: 1.5 m
– Burgundy thread, wool/leather needle 100/16 (machine), hand needle, pins
– Scissors, tape measure, chalk, heavy paper (about 1.2 × 1.2 m for the pattern)
Note: the fur should be in the same tone as the cape fabric. Cream or beige fur looks heavy and cold on this model; tone on tone it looks rich and elegant.
SIZE: ONE SIZE, YOU CHOOSE THE LENGTH
The neck radius is the same for everyone: r = 14 cm.
Length (L): the distance measured with a tape from the base of the back neck (the prominent bone at the nape) to the hem you want.
R = r + L
| Length (L) | R | Wool fabric | Lining | Fur |
|---|---|---|---|---|
| 85 cm | 99 cm | 2.2 m | 2.2 m | 1.2 m |
| 90 cm | 104 | 2.3 m | 2.3 m | 1.3 m |
| 95 cm | 109 | 2.4 m | 2.4 m | 1.3 m |
| 100 cm | 114 | 2.5 m | 2.5 m | 1.4 m |
The fabric must be 150 cm wide.
DRAFTING THE PATTERN
The pattern is two quarter circles (left half and right half).
1. Mark point O in one corner of the paper. From the corner, follow the two edges: one edge is the "centre back seam", the other the "front edge".
2. With a string and pencil, draw a small arc with radius r = 14 cm from point O. This is the neck curve.
3. Lengthen the same string to R (109 cm for a 95 cm length). Draw the large arc. This is the hem.
4. Cut along the edges. Cut the second piece from the reverse side of the same pattern (mirrored).
5. Add a 1.5 cm seam allowance to every edge.
CUTTING
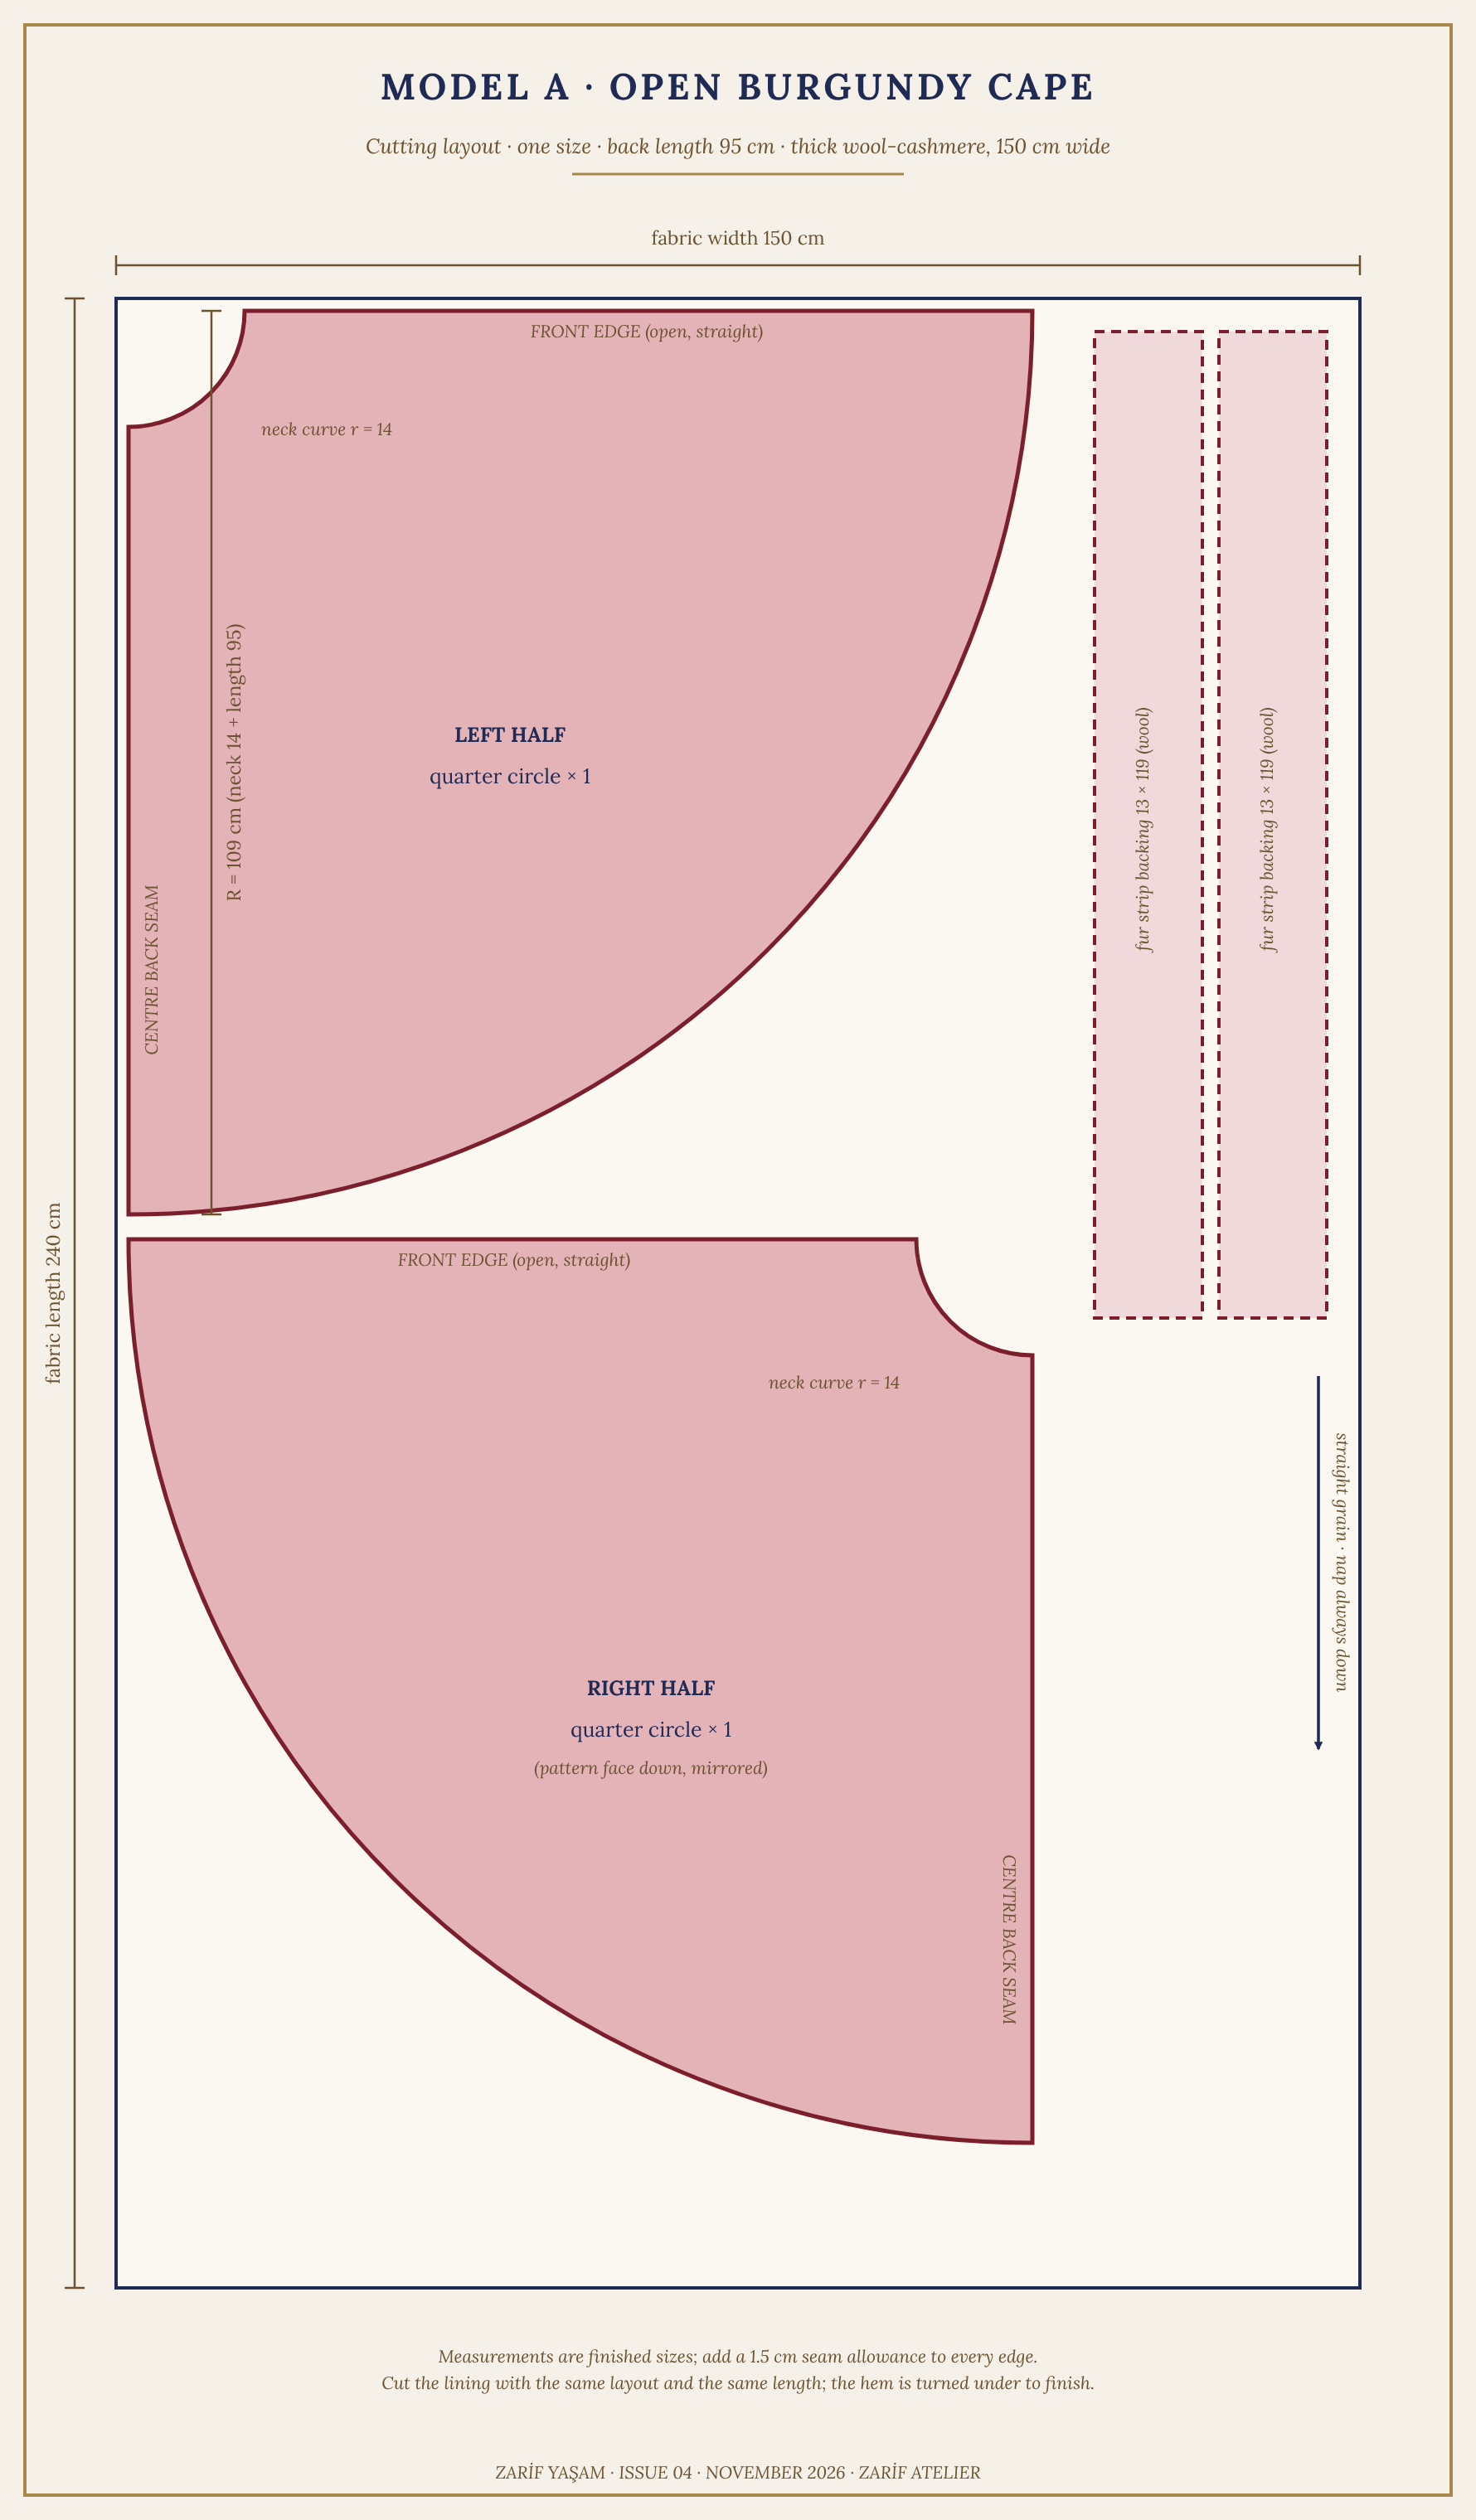
– Lay the fabric in a single layer, right side up. Place the left half in the top-left corner and the right half (pattern face down) below it. The centre back edge of both pieces should run parallel to the lengthwise grain of the fabric.
– The nap should point downwards on both pieces.
– From the strip left at the side, cut two fur-strip backings of 13 × 119 cm.
– Cut the lining with the same layout and the same length; the hem is turned under to finish. If you cut the lining short, it pulls on the wool and distorts the hem.
If your fabric has no nap or pattern, you can place the second piece in the opposite direction and reduce the fabric to about 1.8 m. Because cashmere has a nap, this is not recommended.
SEWING
Step 1 · Preparation. Before cutting, pre-shrink the fabric with a steam iron. Try the pattern first cut from tracing paper, placed on your shoulders. If the neck curve feels tight, deepen it by 1 cm.
Step 2 · Centre back seam. Place the two wool pieces right sides together along the centre back edges, sew with a 1.5 cm allowance and press the seam open. Join the lining the same way.
Step 3 · Resting on a hanger. Put the wool part on a hanger and leave it for 24 hours. The hem of circle cuts stretches somewhat. The next day, level the hem and trim the excess.
Step 4 · Lining. Place the wool and lining right sides together. Sew the neck curve, both front edges and the hem in one continuous line (1.5 cm allowance). Leave a 40 cm opening at the hem. Notch the neck curve at 1 cm intervals and clip the corners diagonally.
Step 5 · Turning. Turn through the opening. Press the edges with a damp cloth; the lining should sit 2 mm inside the wool. Close the opening by hand (invisible stitch).
Step 6 · Loops. Sew 1 cm burgundy ribbon loops along the front edges, 1 cm in from the edge, at 10 cm intervals. Add 3 loops along the neck curve on the same edge too (5, 11 and 17 cm from the centre back). In total 13 loops on each half, 26 on both halves.
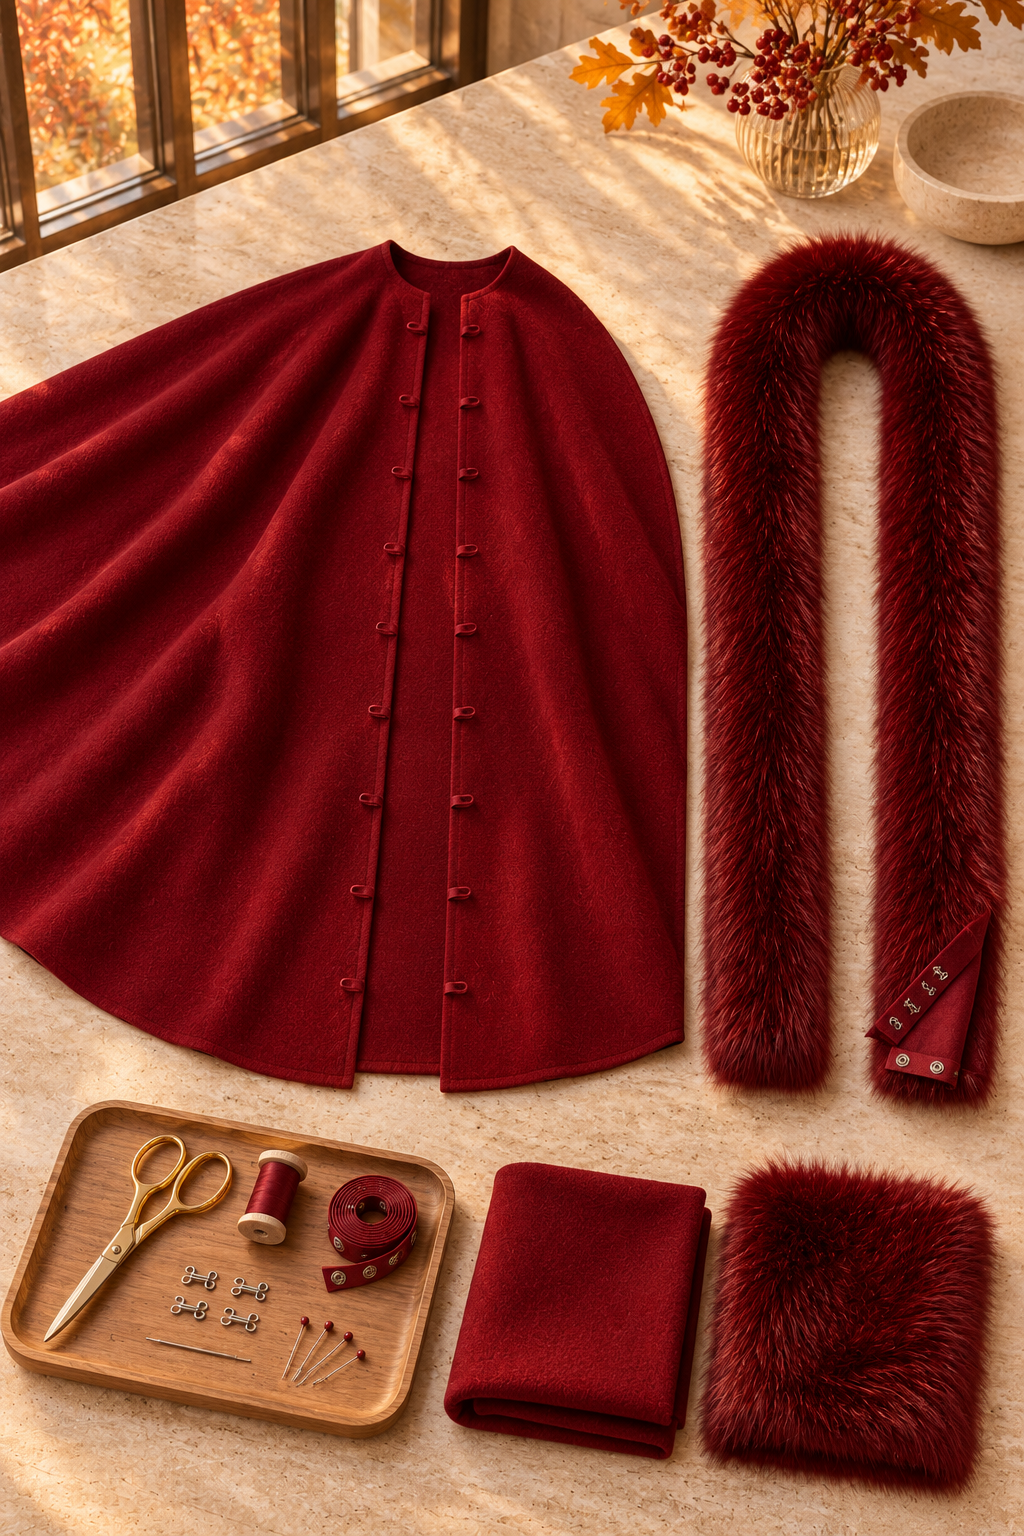
THE FUR STRIP
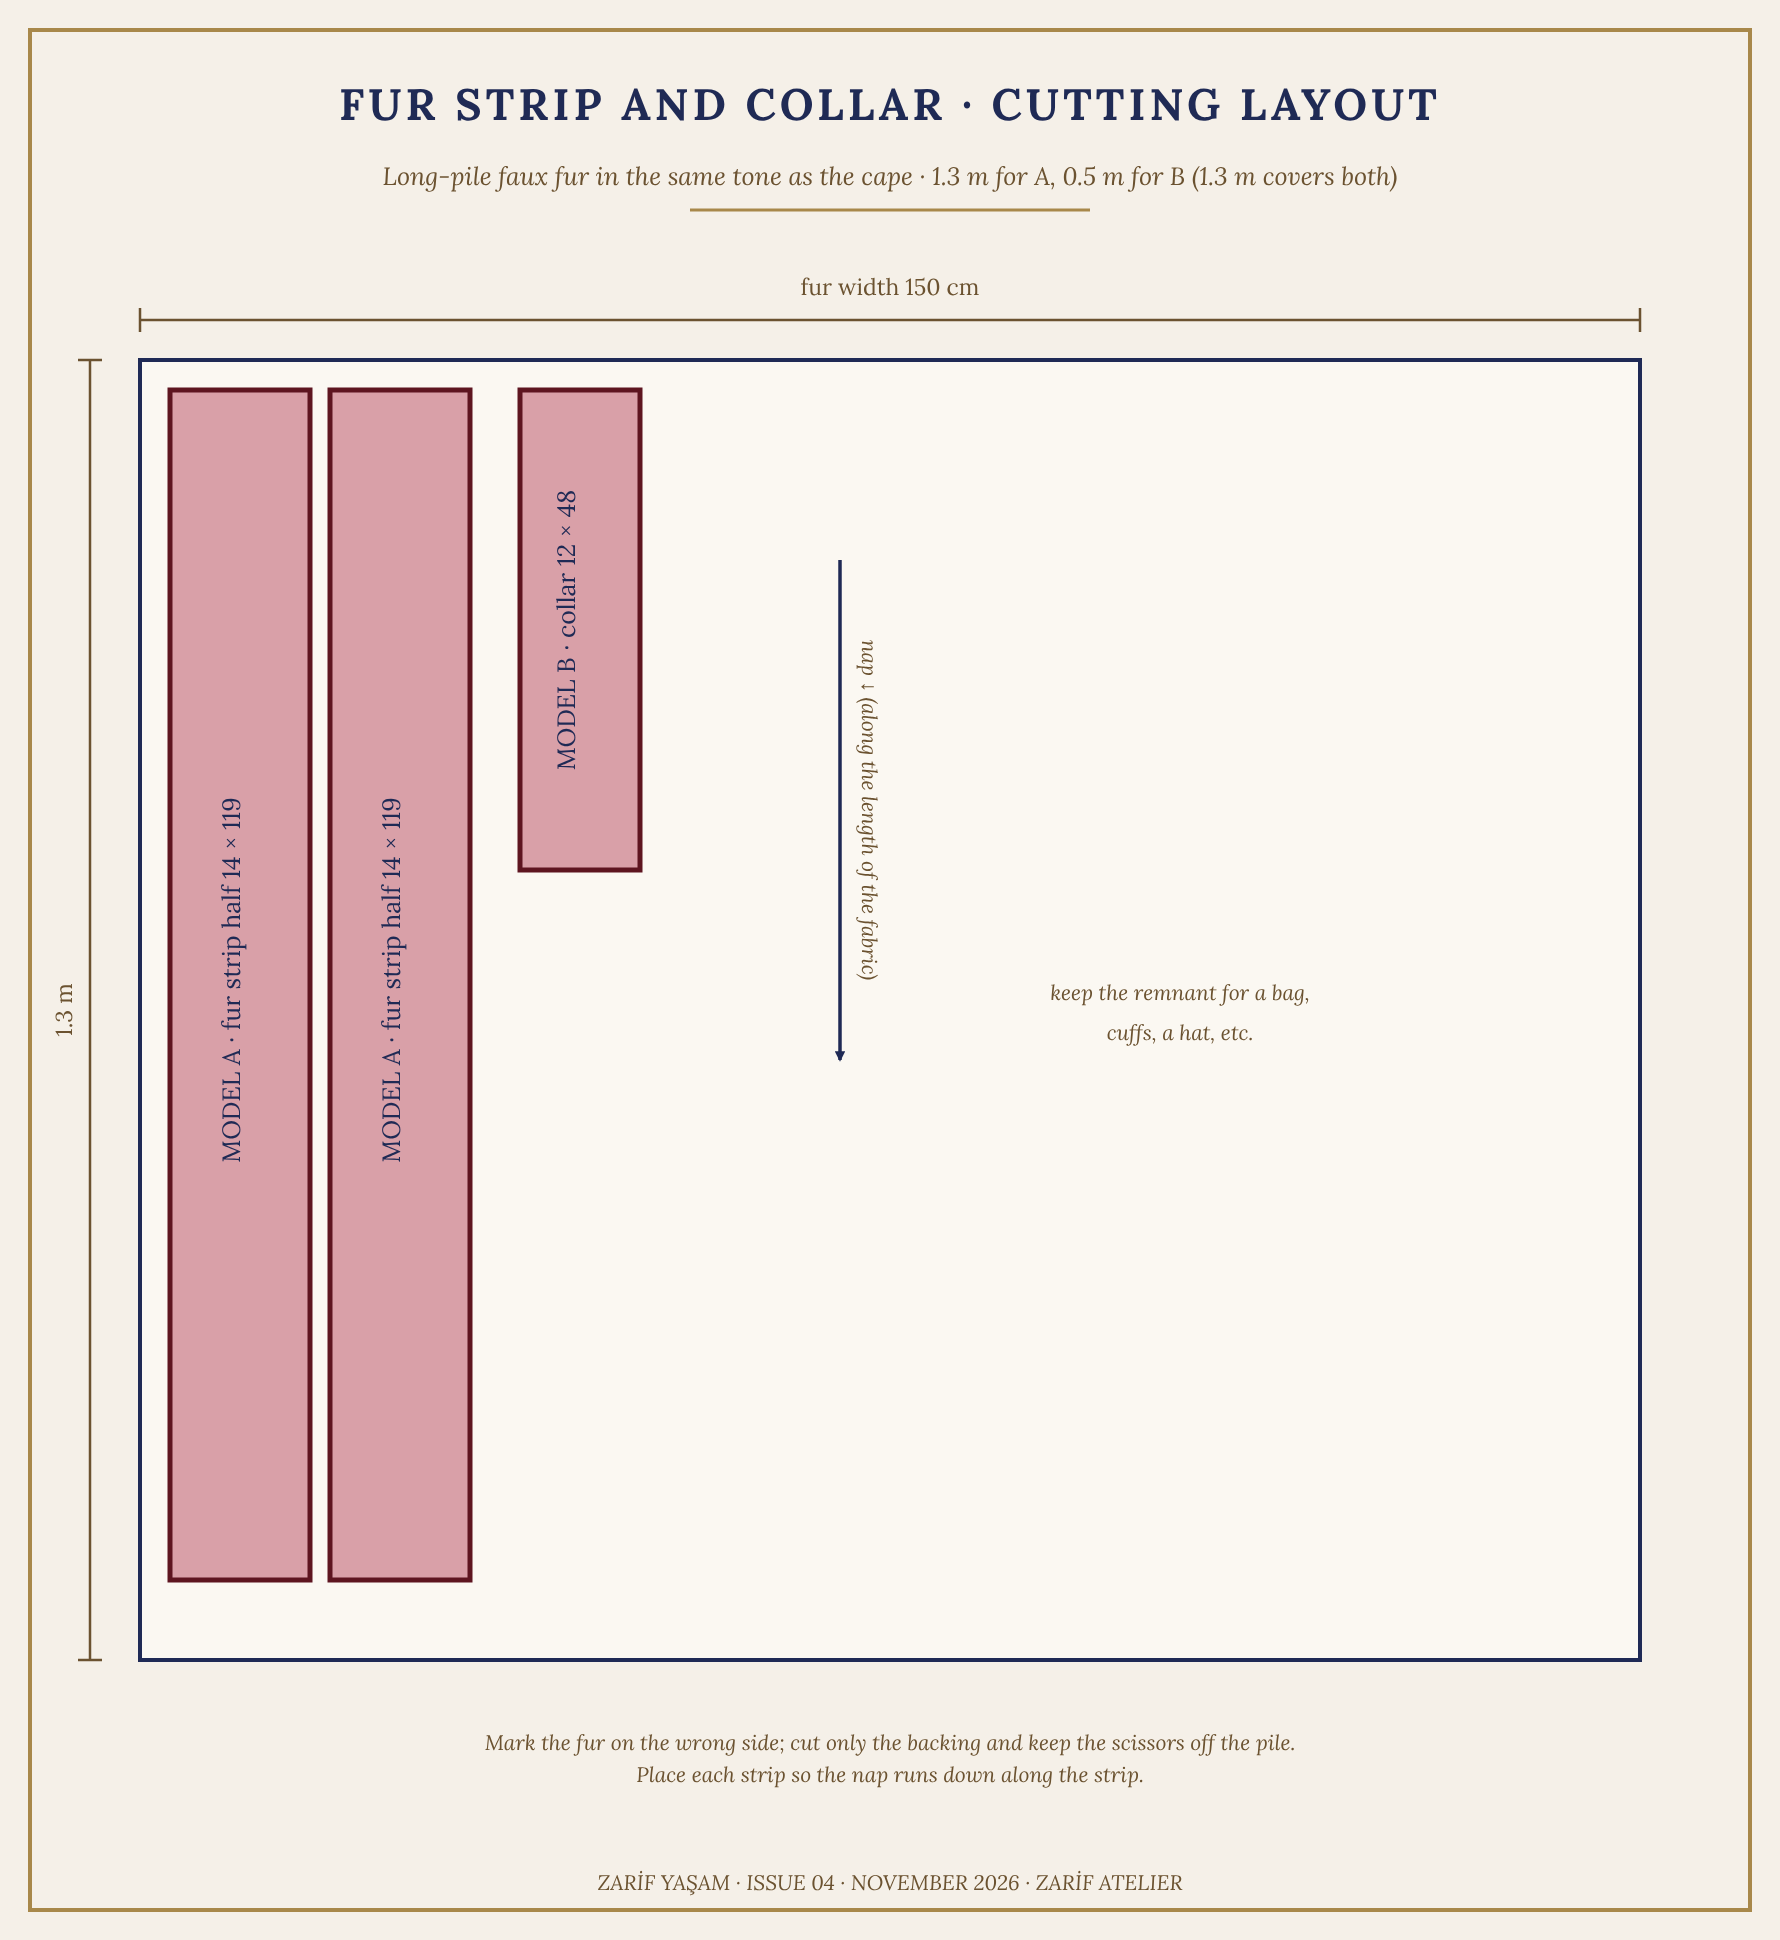
Step 7 · Cutting. Mark the fur on the wrong side: two strips 14 cm wide and 119 cm long. The pile should run along the strip, from the neck towards the hem. Cut only the backing; with one blade of sharp-pointed scissors or a fine knife. Don't let the scissors touch the pile.
Step 8 · Backing. Place each fur strip right sides together with a 13 × 119 cm wool backing (pile inside). Sew the two long edges and the short edge at the hem with an 8 mm allowance and a long stitch length (3.5). Leave the neck end open.
Step 9 · Turning. Turn right side out and pull the pile out of the seams with a needle. Join the two neck ends at the centre back: blend the pile of the two furs together and close the wool backings by hand (ladder stitch).
Step 10 · Hooks. On the wool backing of the strip, sew hooks from neck to hem at 10 cm intervals, positioned opposite the loops. Three extra hooks at the neck (5, 11, 17 cm from the centre back).
Step 11 · Attaching. Settle the strip on the cape's neck curve at the centre back and slip the hooks into the loops one by one. To remove, reverse the order.
PART 2 · MODEL B · CAMEL BUTTONED CAPE (WITH A FUR COLLAR)
Model: three fabric-covered buttons at the front, four pieces, shoulder seams, slits at the sides for the arms. A short, round, soft fur collar at the neck. An everyday elegant length that falls to the hip.
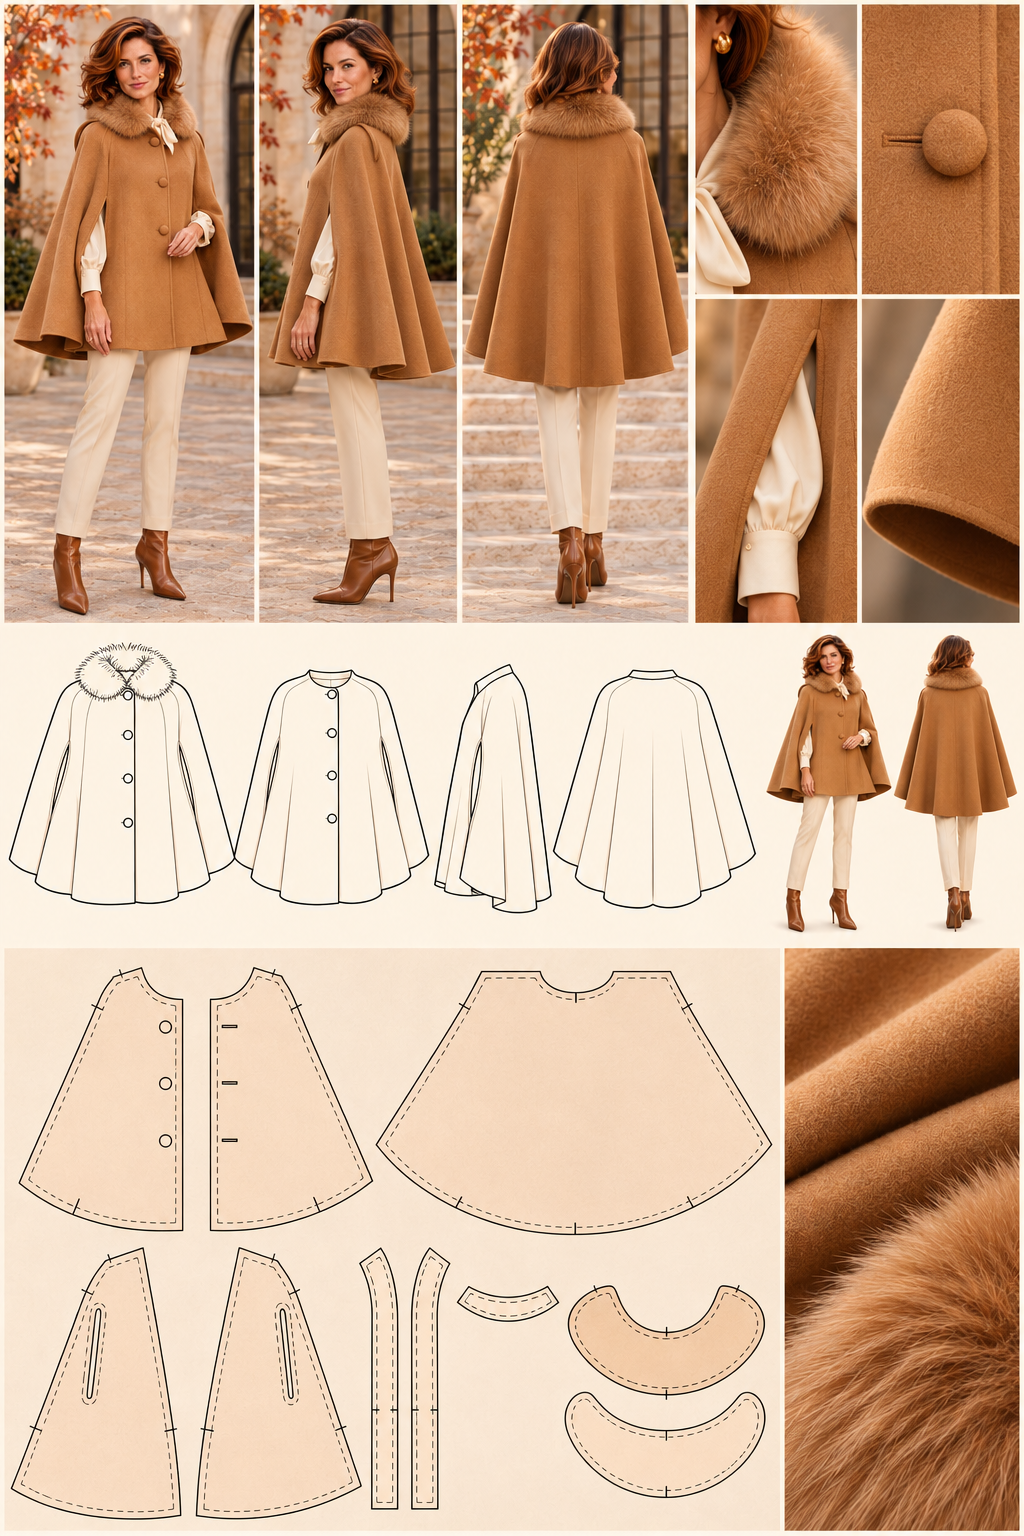
MATERIALS (for a back length of 72 cm)
– Thick wool-cashmere fabric, warm camel, 150 cm wide: 1.6 m
– Lining, camel or cream: 1.6 m (140–150 wide)
– Faux fur in the same camel tone or one shade lighter: 0.5 m (12 × 48 cm collar)
– Self-cover buttons 3 cm (size 48): 3. Cover them with fabric remnants.
– Medium-weight fusible interfacing: 0.3 m
– Hook and eye, 1 set (for the neck)
– Camel thread, 100/16 machine needle, a sturdy hand needle
SIZE: ONE SIZE, YOU CHOOSE THE LENGTH
Neck radius r = 14 cm. Length (L): from the bone at the nape to the hem you want.
R = r + L. Each piece is a 45° segment of a circle.
| Length (L) | R | Wool fabric (150 wide) | Lining |
|---|---|---|---|
| 66 cm | 80 cm | 1.5 m | 1.5 m |
| 72 cm | 86 cm | 1.6 m | 1.6 m |
| 75 cm | 89 cm | 1.7 m | 1.7 m |
With this layout, for lengths over 75 cm the pieces will not fit on folded fabric. If you want it longer, lay the fabric in a single layer and cut the four pieces separately (about 2.9 m).
DRAFTING THE PATTERN
Four pieces, each the same segment: Front × 2, Back × 2.
1. Mark a point O on the paper and draw a vertical centre line downwards from it.
2. From point O, draw two lines at 22.5° on either side of the centre line (45° in total between the two lines). Use a protractor.
3. With a string and pencil, draw the small arc of r = 14 cm from O, then the large arc of R = 86 cm (for a 72 cm length). The segment is ready.
4. Add 3 cm to the centre front edge of the front piece: the button and buttonhole allowance. There is no extension on the back piece.
5. A 1.5 cm seam allowance on every edge.
6. On the shoulder-side edge of the front piece, mark the section between 18 cm and 46 cm from the neck curve: the arm slit.
CUTTING
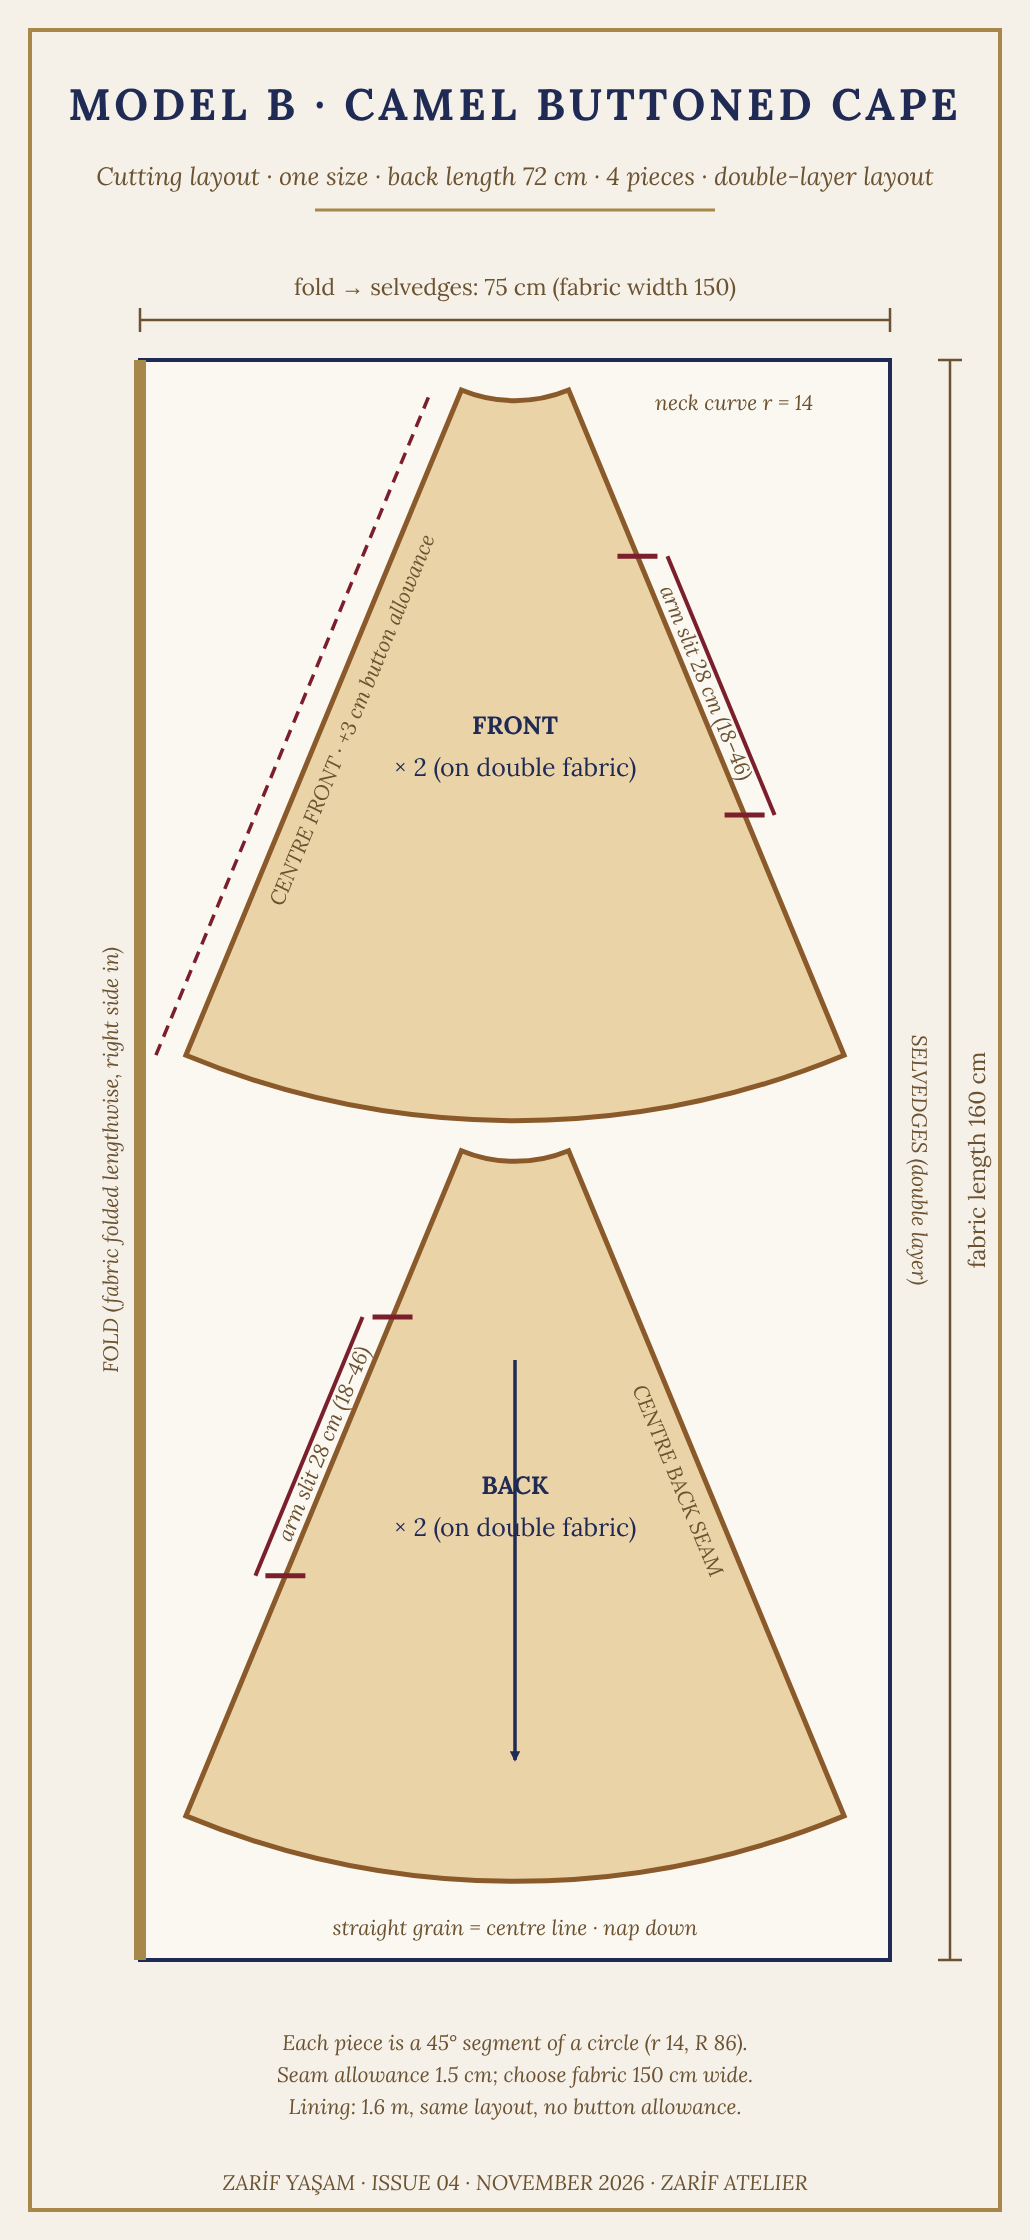
– Fold the fabric in half lengthwise (right side in), with the fold on the left.
– Place the Front and Back segments with the centre line parallel to the lengthwise grain. Because each is cut on double fabric, you get two pieces (mirrored).
– Nap pointing downwards.
– Cut the lining with the same layout, without the front button allowance.
– Cut interfacing into 8 cm wide strips for the two front edges and fuse them.
SEWING
Step 1 · Preparation. Pre-shrink the fabric with steam. Try the pattern cut from tracing paper: check the neck curve, the fit at the shoulders and that the arm slit sits where your hand will come out.
Step 2 · Shoulder-side seams. Place the front and back pieces right sides together along the shoulder-side edges. Sew from 0–18 cm from the neck and from 46 cm down to the hem. Leave 18–46 cm (the arm slit) open. Backstitch 1 cm at both ends of the slit to reinforce it. Press the allowances open.
Step 3 · Slit edges. Fold the slit allowance 1 cm to the inside and stitch at 5 mm.
Step 4 · Centre back seam. Join the two back pieces at the centre back and press the allowance open.
Step 5 · Lining. Join the lining the same way, but leave the slit closed and fold the lining's slit allowance inwards. Hang the wool and the lining separately on a hanger and leave for 24 hours; level the hem.
Step 6 · Collar. Cut a 12 × 48 cm strip of fur (pile along the strip, cutting only the backing). Place it on the right side of the wool with the pile facing the wool and the fur backing aligned with the neck edge. The ends should finish 1.5 cm inside the front edges.
Step 7 · Lining. Place the lining right sides together with the wool, sandwiching the collar between them, and sew the neck curve, both front edges and the hem in one continuous line (1.5 cm allowance). Leave a 40 cm opening at the hem. Notch the curves and clip the corners.
Step 8 · Turning. Turn through the opening. The fur collar rises outwards; pull the pile out of the seam with a needle. Press the edges with a damp cloth. Close the hem opening by hand.
Step 9 · Slit lining. Attach the lining's slit edges to the wool's slit edges by hand with an invisible stitch.
Step 10 · Buttons and buttonholes. On the front edge, mark three button positions 3, 20 and 37 cm down from the neck edge. Make 3.5 cm buttonholes on the overlapping front piece (the right front on womenswear). Cover the buttons with fabric and sew them to the under front piece. Add a hook and eye at the neck edge.
PART 3 · THE FINER POINTS OF WORKING WITH THICK WOOL AND FUR
– When sewing thick wool, use a 100/16 machine needle and a stitch length of 3.0–3.5. As the wool bunches, reduce the presser-foot pressure slightly.
– Press the allowance open after every seam; with thick wool, pressing is half the sewing.
– Grade the allowances at the corners so they don't bulk when turned.
– When cutting fur, cut only the backing. While sewing, tuck the pile into the seam allowance with a finger or a small pin; after turning, pull it out with a needle.
– Circle-cut hems stretch on the bias. Never level a hem before resting it on a hanger for 24 hours.
– Care: the cape goes to the dry cleaner's. Remove the fur strip and send it separately, or wipe it with a damp cloth in the direction of the pile.
Both capes rest on the same idea: a good fabric, the right cut, patience. Making something with your own hands that you will carry on your shoulders all winter has a pleasure all its own.
If you send us photographs of your sewing, we will be happy to share them in Zarif Yaşam: contactf@zarifyasam.com
THE SEA'S STITCH: EMBROIDERING A TABLE SET WITH FISH AND OYSTERS
On the machine, in a hoop, over a weekend: a tablecloth and napkins
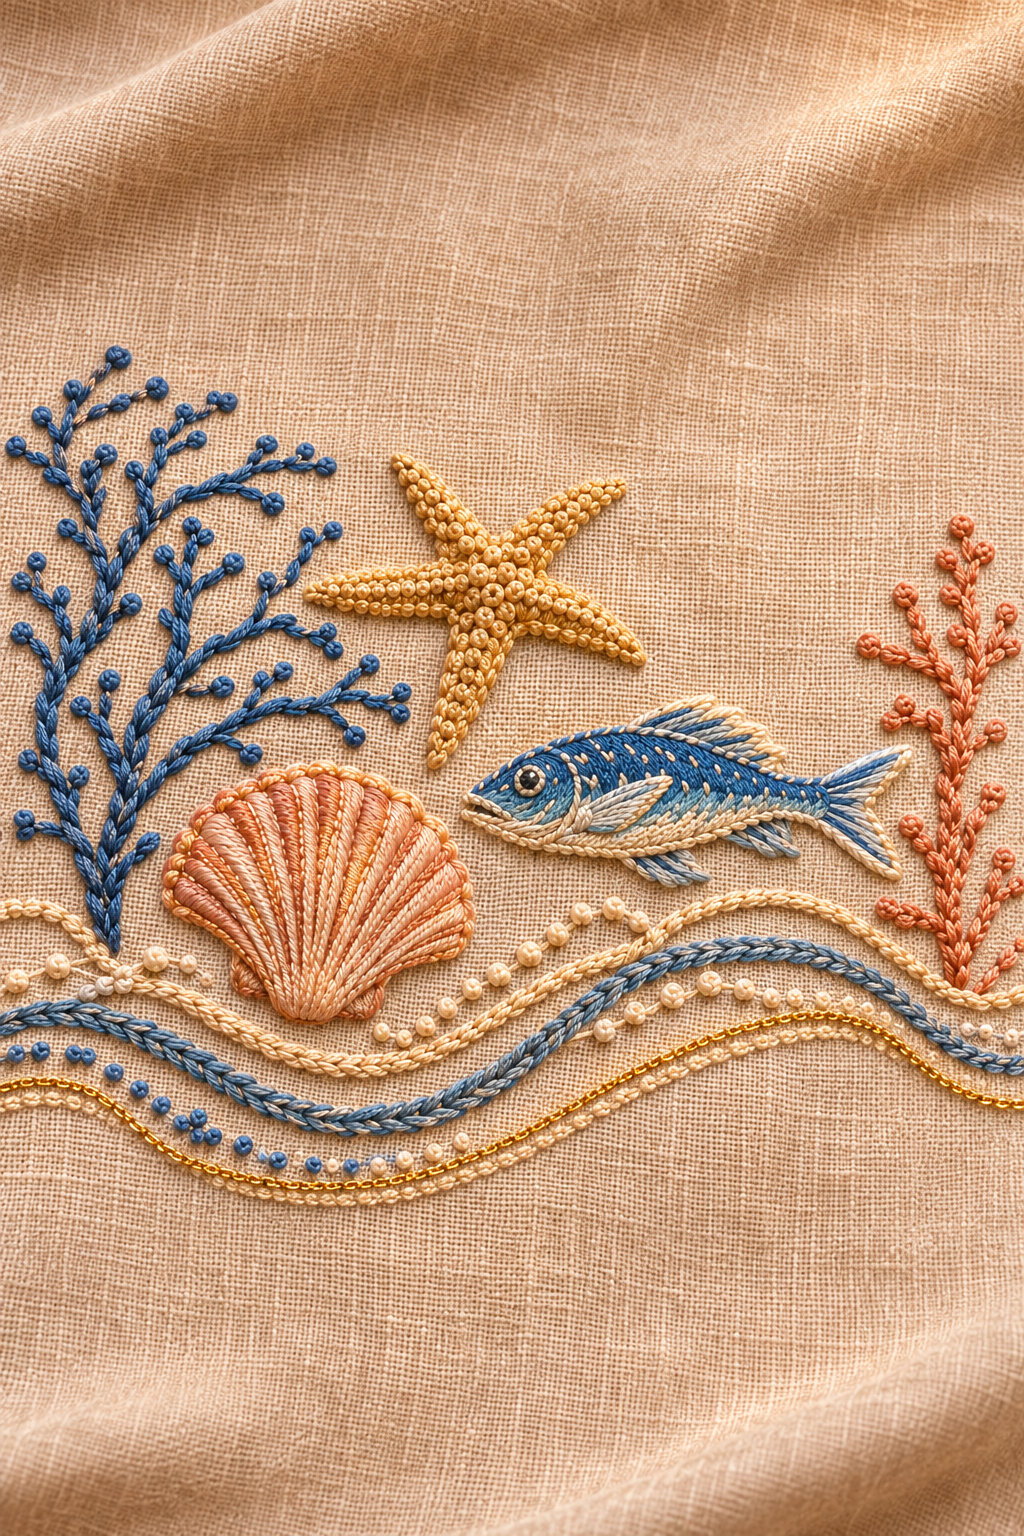
The most personal touch of the winter fish supper we set in Zarif Table is the cloth spread on the table and the napkin placed in front of each guest.
This month we embroider both with our own hands. Along the edge of the cloth, a blue fish, a golden starfish, an orange scallop shell and corals, with waves beneath. And in the corner of each napkin, an oyster with its pearl gleaming inside.
We do the work on a home electric sewing machine, with a hoop. A method that looks hand-embroidered but is finished much faster. First we learn the motifs; once you have done both, the rest is repetition.
IN SHORT: WHAT WILL WE MAKE?
– Tablecloth: natural linen, finished size about 145 × 245 cm (a table for 6–8). A motif band on the short sides.
– Napkin: natural linen, finished size 45 × 45 cm, with a drawn-thread (hemstitched) edge and an oyster in the corner.
– Technique: free-motion embroidery on an electric machine, without the presser foot, in a hoop.
MATERIALS
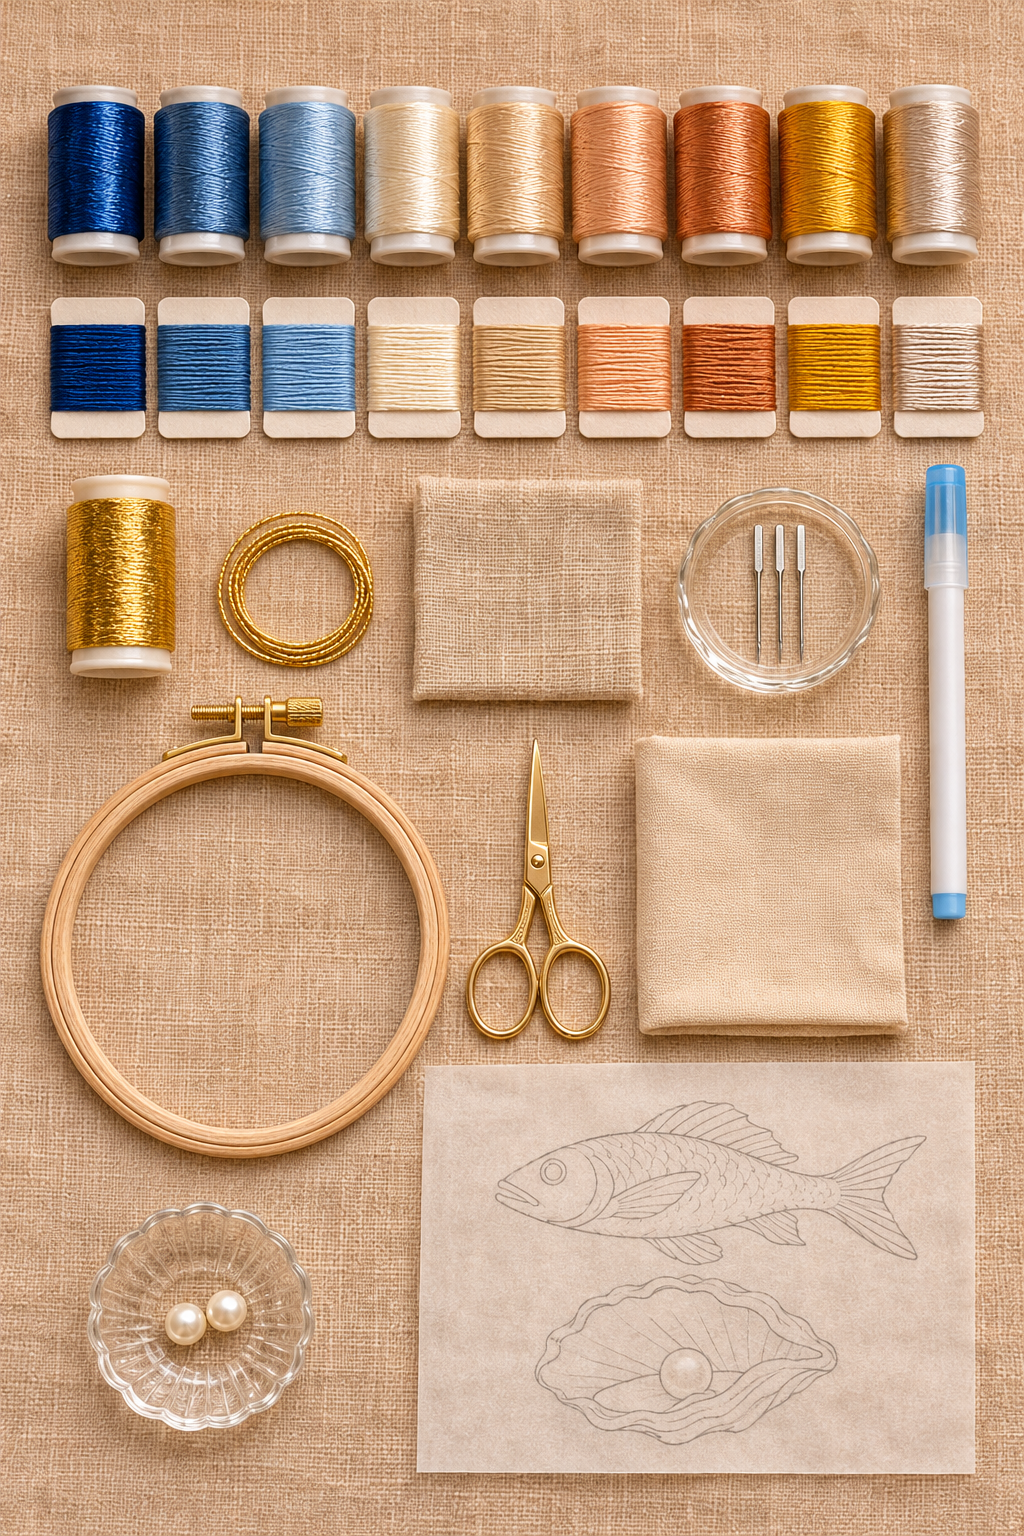
FABRIC
– Natural linen (sand beige or ecru), 150 cm wide: 2.5 m for the cloth, 1.5 m for 8 napkins. 4 m in total.
– A small piece of the same linen for practice.
EMBROIDERY THREAD (machine embroidery thread, weight 40, one spool of each colour)
Nine shades, from two blue families and gold:
1. Deep cobalt blue: the fish's back, lines, coral, wave
2. Mid denim blue: the fish's body
3. Pale sky blue: the fish's belly, the top row of the wave
4. Ivory cream: the shell's inner light, the eye
5. Warm ecru: the oyster's outer shell
6. Peach: the inside of the oyster, the scallop shell
7. Terracotta orange: coral, shell lines, starfish spots
8. Mustard gold: the starfish, fish scales
9. Pearl beige: the pearl and the shell's shading
Also: gold metallic embroidery thread, 1 spool.
EXTRA MATERIALS
– Gold cord (2 mm), 1 m: to embellish the wave line
– Pearl beads, 6 mm, 8 (1 per napkin) and 10–12 small pearls (for the cloth)
– Wooden embroidery hoop, 20 cm in diameter
– Fine, sharp-pointed machine needle (75/11)
– Water-soluble pen, tracing paper, gold scissors, pins
– The two templates on this page (below): the oyster and the cloth's motif band
PART 1 · PREPARING THE FABRIC AND THE MACHINE
Prepare the fabric. Washing and ironing the linen twice prevents it from shrinking or losing colour later. Cut the fabric to 150 × 250 cm for the cloth and 48 × 48 cm for the napkins.
Prepare the machine. The secret of this work is being able to move the fabric freely with your hands.
– Remove the foot (the presser foot). The embroidery is done without the foot.
– Lower the feed dogs. The machine should not pull the fabric itself; you set the direction.
– Choose the same colour for the top and bobbin threads, or use a fine white thread in the bobbin.
– Leave the top thread tension at its normal setting. Check first on a test piece of the same fabric.
– Set up the hoop with the fabric drum-tight and the linen's grain straight. Lay the hoop flat on the machine bed; don't hold it in the air. When the fabric sits close to the needle plate, the stitches settle neatly.
Note: we don't use interfacing in this method; it is enough to set the fabric in the hoop fully taut.
PART 2 · TRANSFERRING THE DESIGN TO THE FABRIC
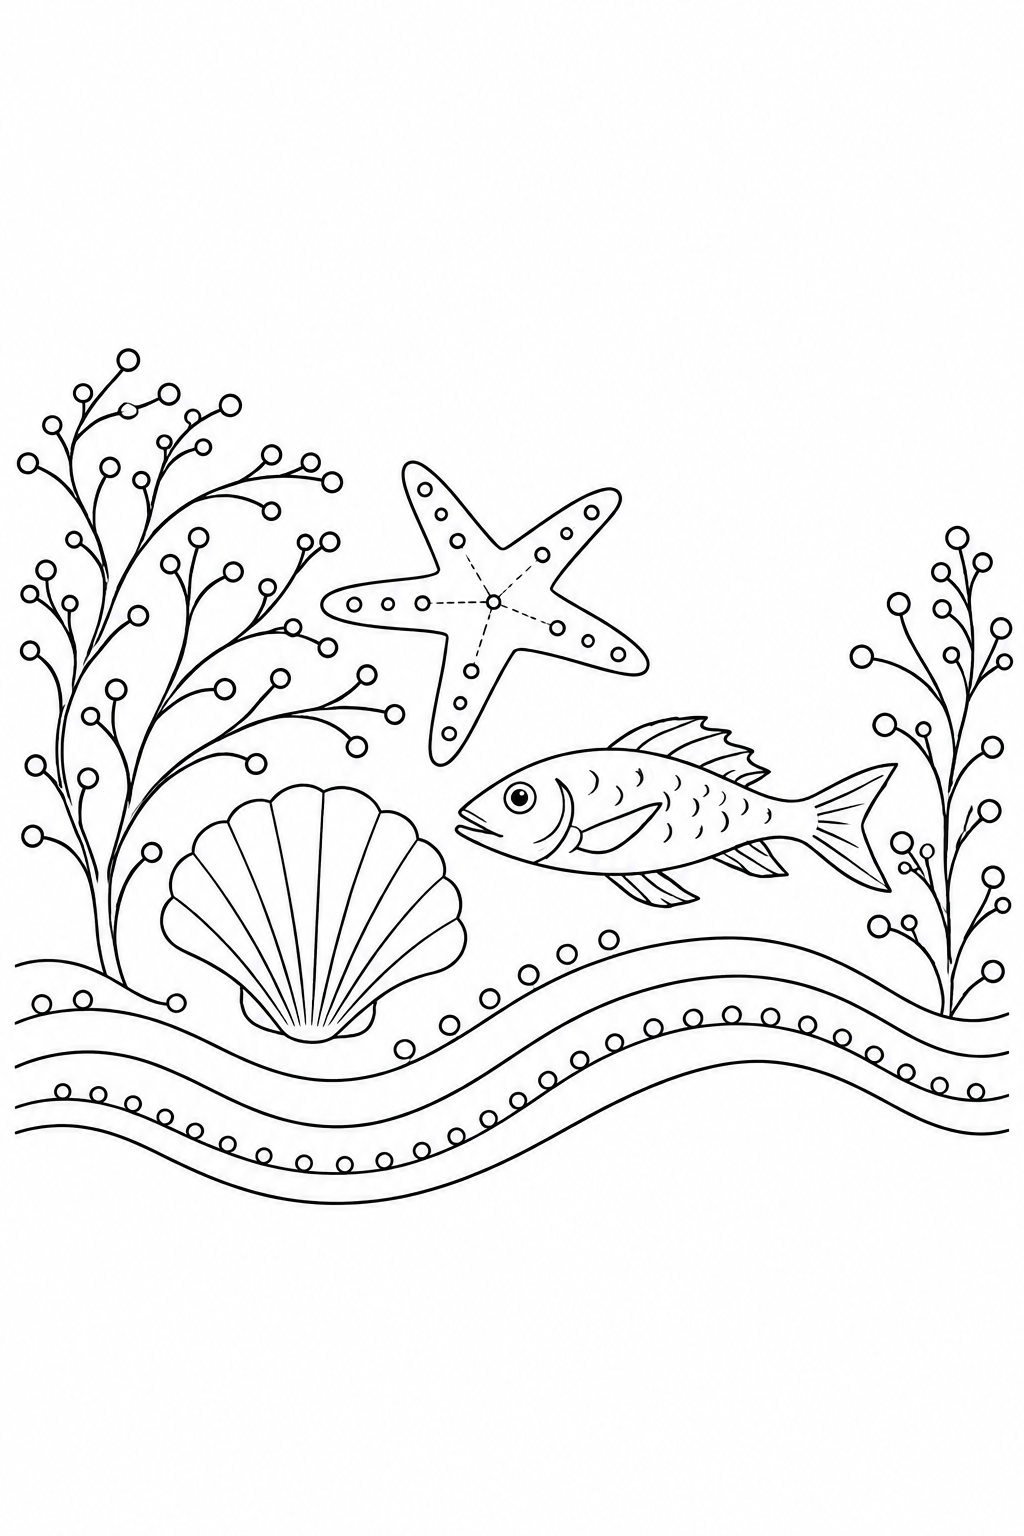
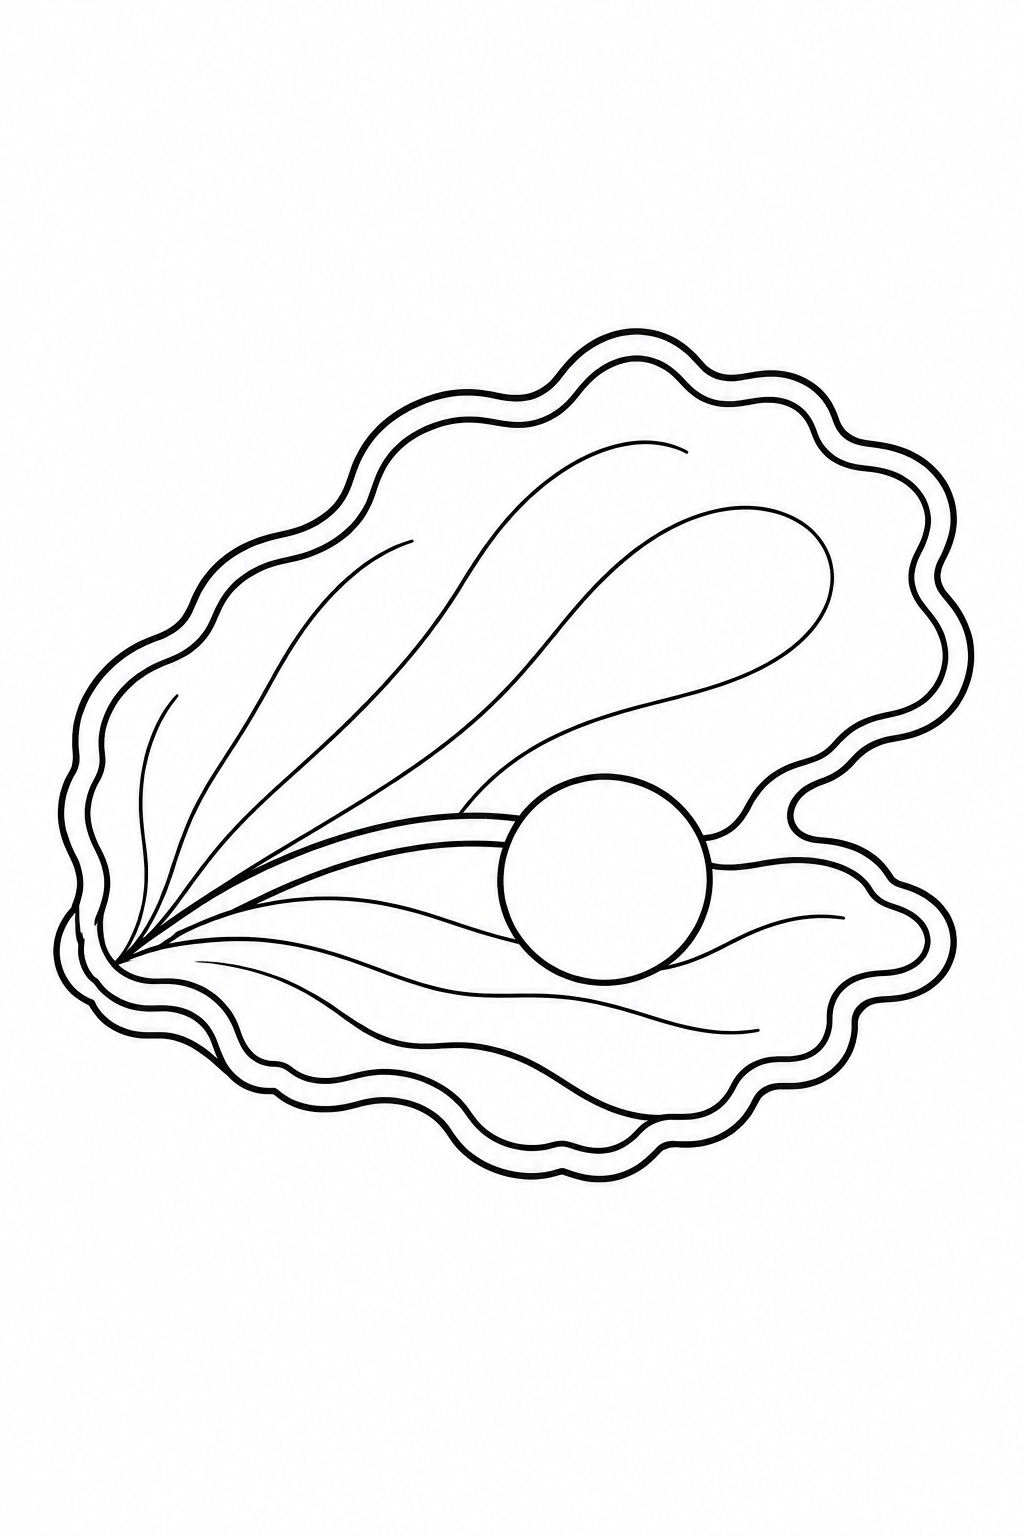
First print or photocopy the templates.
– Cloth band: about 40 × 18 cm.
– Oyster: about 12 × 10 cm.
Trace the lines onto tracing paper, place it on the fabric and go over it with the water-soluble pen. The line transfers to the face of the fabric and wipes off with a damp cloth when the work is done.
Placement:
– On the cloth, the motif band sits in the middle of both short sides, about 12 cm in from the edge. If you like, you can repeat the band at the corners.
– On the napkin, the oyster sits in one corner (5 cm in from both edges). When you fold the napkin into a triangle and place it under the plate, the embroidered corner shows at the edge of the plate.
PART 3 · EMBROIDERING THE FISH
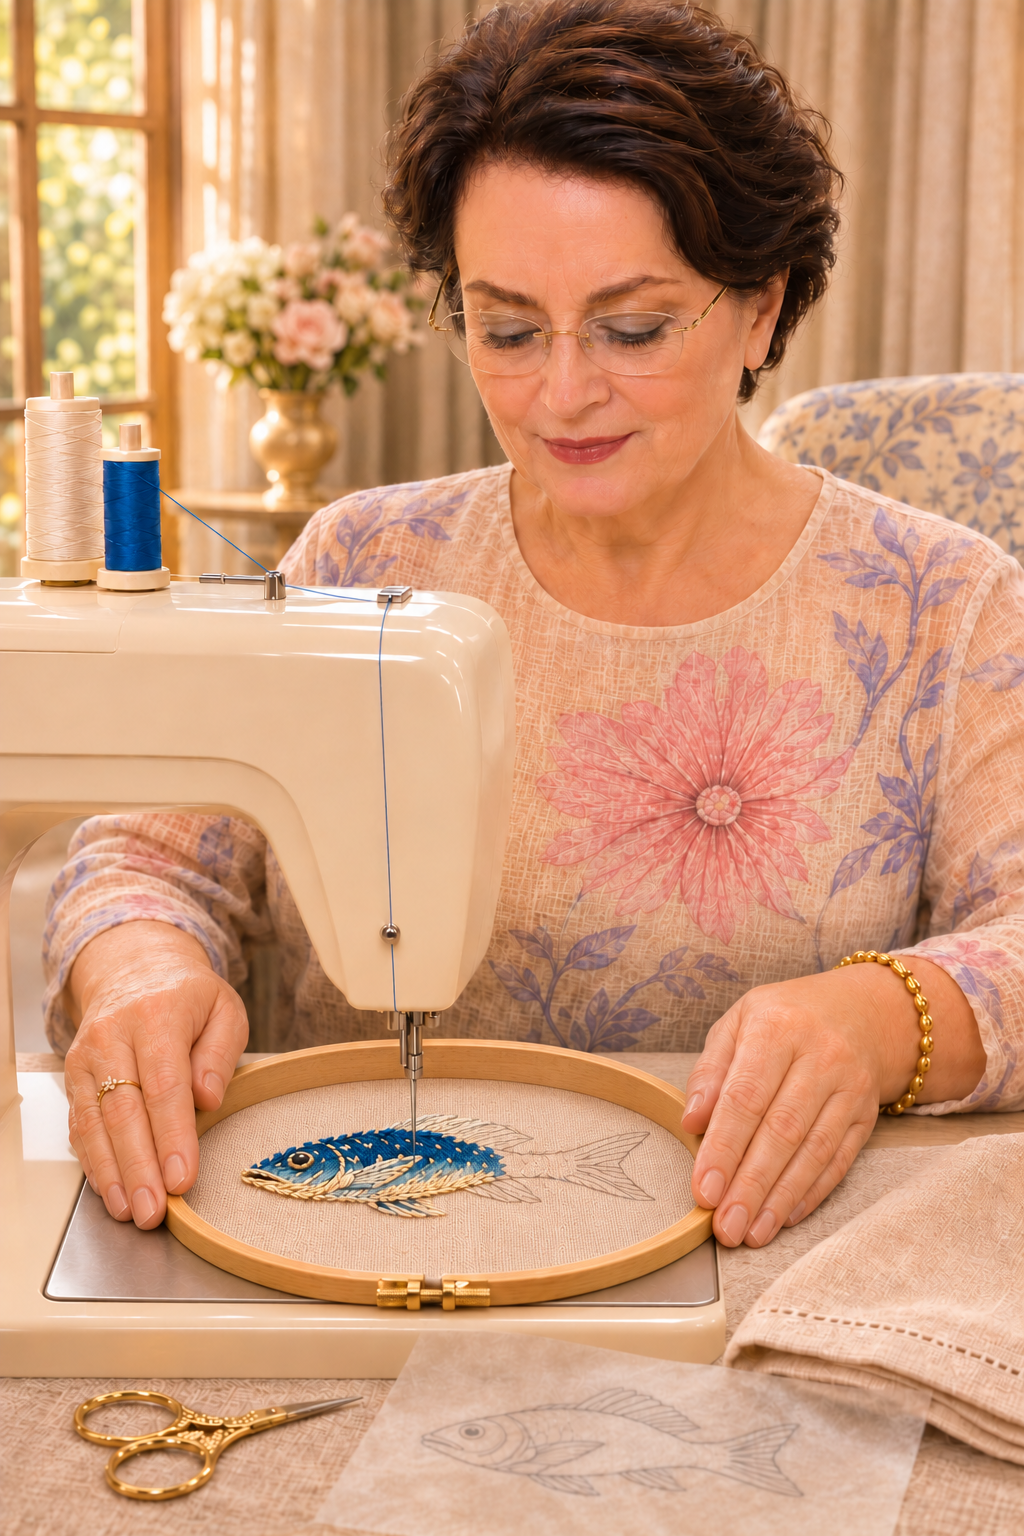
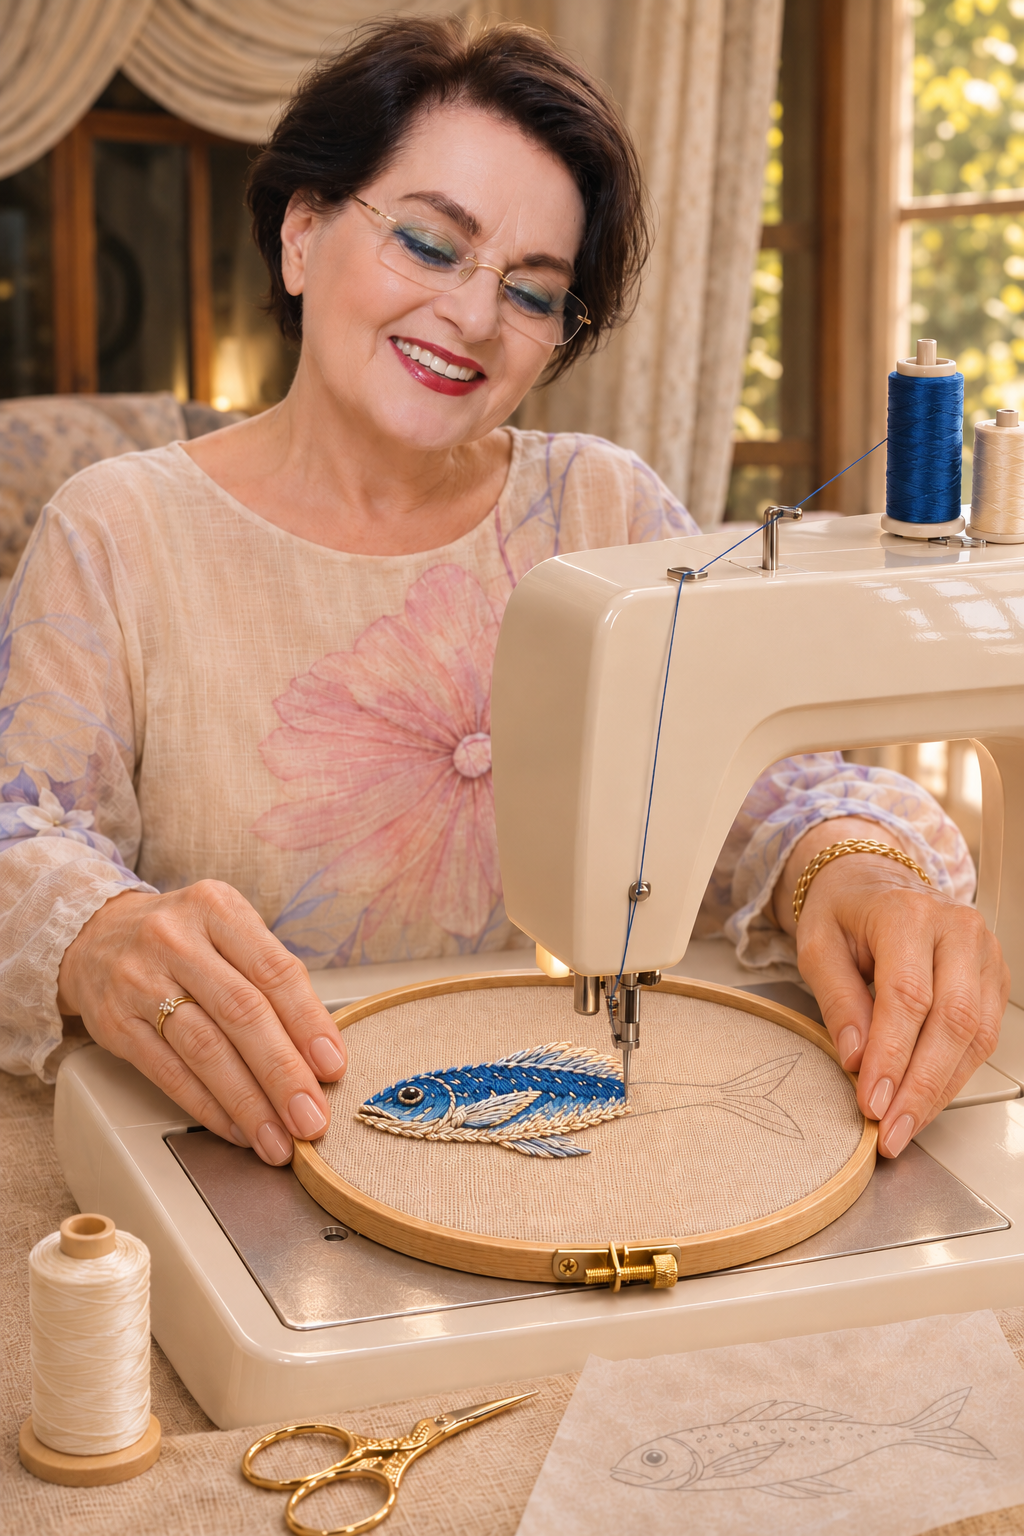
The fish is the easiest part of the work; start with it.
1. Outline. Go over the fish's outline in deep cobalt (1). Work with small, close stitches; move your hands slowly along the line.
2. Filling the body. Fill the body in mid denim blue (2). Lay the stitches side by side from head to tail, in the direction of the fish. Working without changing direction gives a glossy, even surface.
3. Belly and back. Add pale sky blue (3) to the belly and deep cobalt (1) to the back. Where the shades meet, overlap the stitches slightly; the transition softens.
4. Fins and tail. Fine lines in cobalt.
5. Scales. Small arcs over the body in mustard gold (8). Not too dense; just enough to catch the light.
6. Eye. A small dot of ivory (4) with cobalt in the centre.
PART 4 · EMBROIDERING THE OYSTER
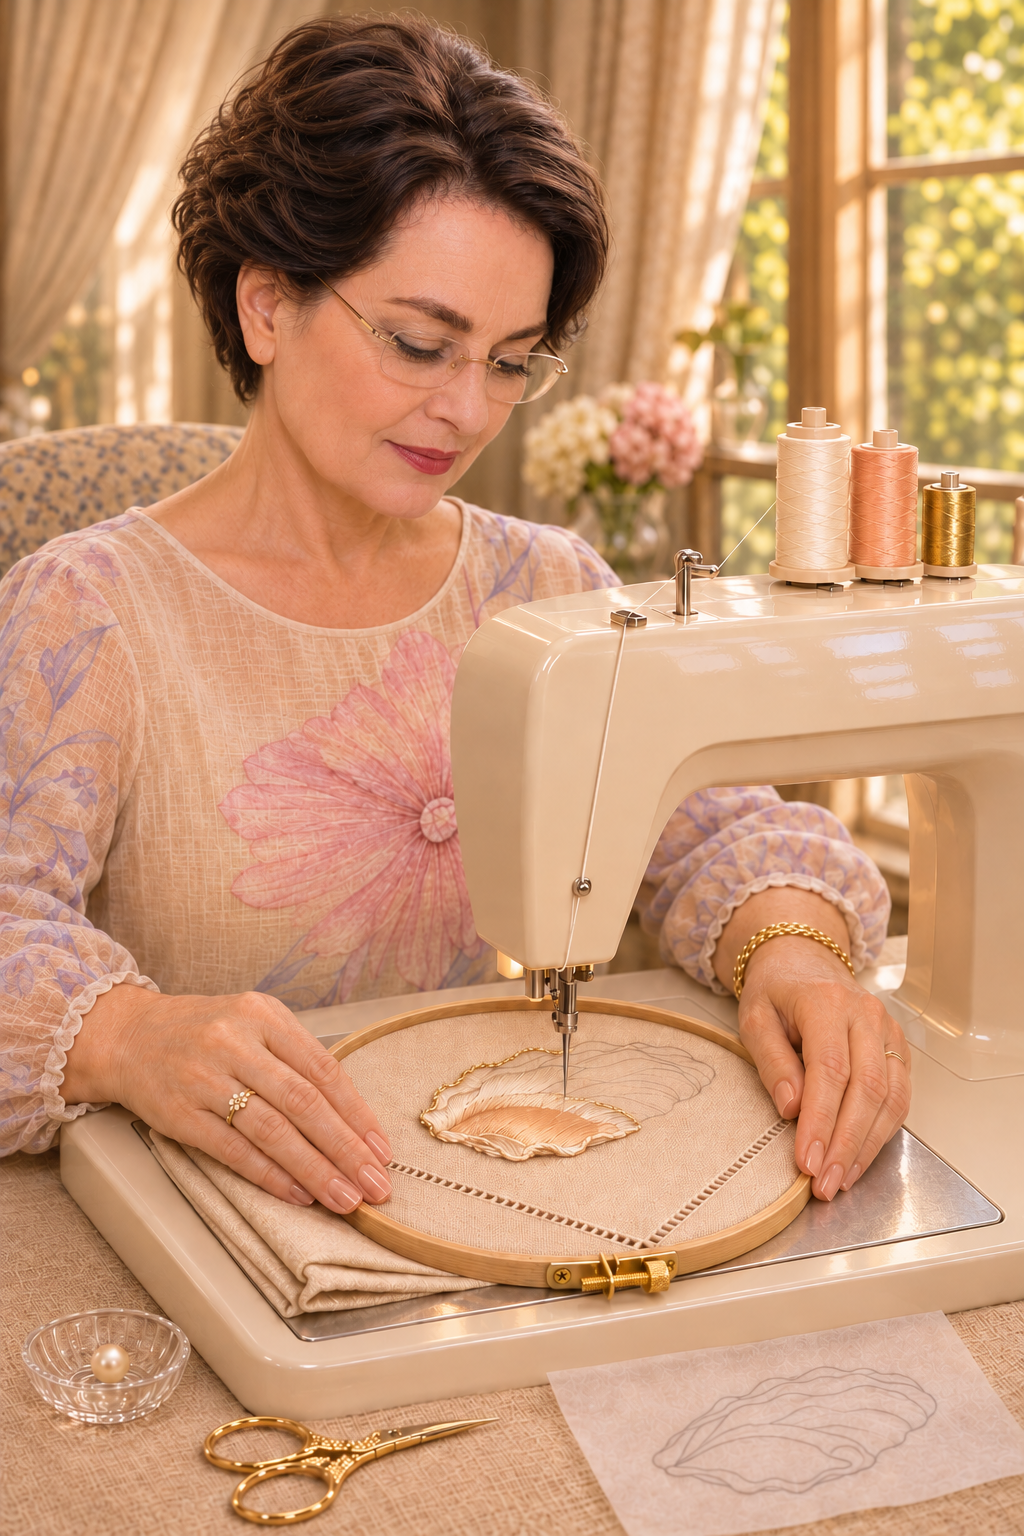
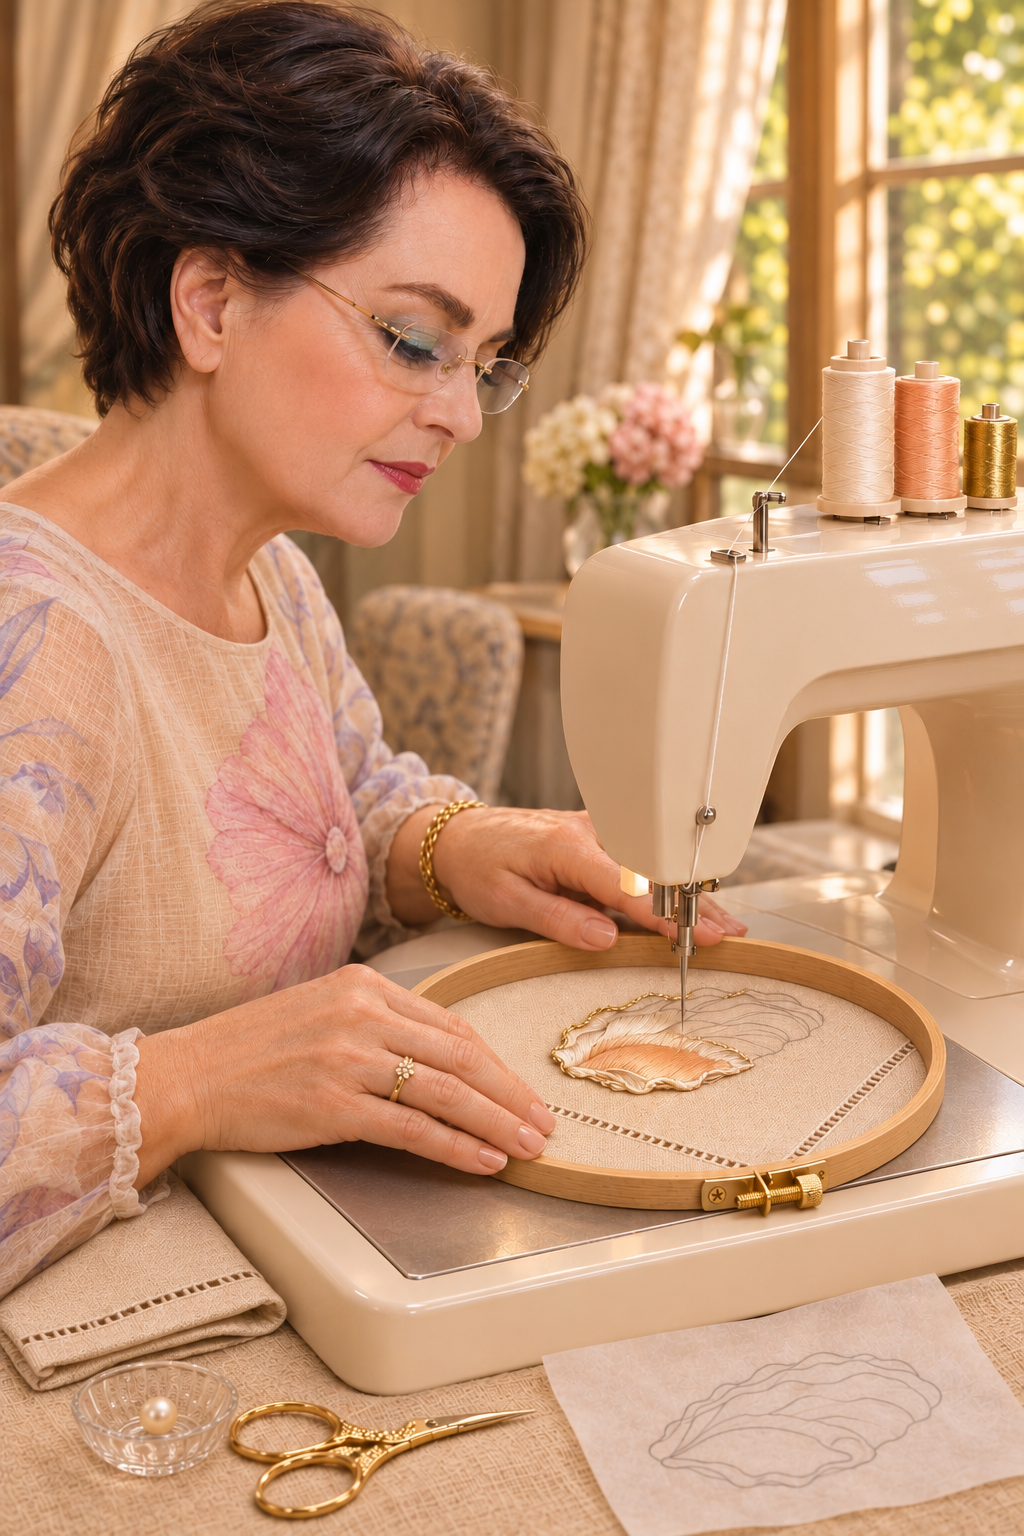
1. Outer shell. Fill the outer shell in warm ecru (5), working inwards from the shell's wavy edge, following its curves.
2. Shell lines. In terracotta orange (7), the lines opening outwards from the centre of the shell.
3. Inner surface. Fill the inside of the shell in peach (6) and pearl beige (9). Blend the two shades at the edges; you get a graded surface like mother-of-pearl.
4. Light. A few fine lines of ivory (4) over the inner surface.
5. Pearl. With the machine, only outline the pearl's place in ivory thread. Sew the pearl bead to the centre by hand after the work is finished.
PART 5 · THE CLOTH'S OTHER MOTIFS AND THE WAVES
– Coral (blue on the left, orange on the right). Fine branches in cobalt and terracotta; the main branch first, then the side branches.
– Starfish. The body in mustard gold (8), the spots in terracotta (7). Fill the arms working towards their tips.
– Scallop shell. Radiating lines from the centre outwards in peach (6) and terracotta (7).
– Waves. Two rows of wave lines in deep cobalt (1) and pale sky blue (3). Add one more row on top in gold metallic thread.
– Gold cord and pearls. Lay the gold cord over the wave and guide it by pulling it with your hands; the machine stitch jumps across the cord and holds it in place. Pearls are not sewn by machine; sew the small pearls between the waves by hand.
PART 6 · FINISHING
1. Take the work out of the hoop. Wipe away the water-soluble pen marks with a damp cloth.
2. Lay a cloth over the embroidery and iron without pressing hard; let the embroidery stay raised.
3. Knot and trim the thread ends on the wrong side.
4. Turn the cloth's edge under 1 cm twice and stitch.
THE NAPKIN'S HEMSTITCHED EDGE
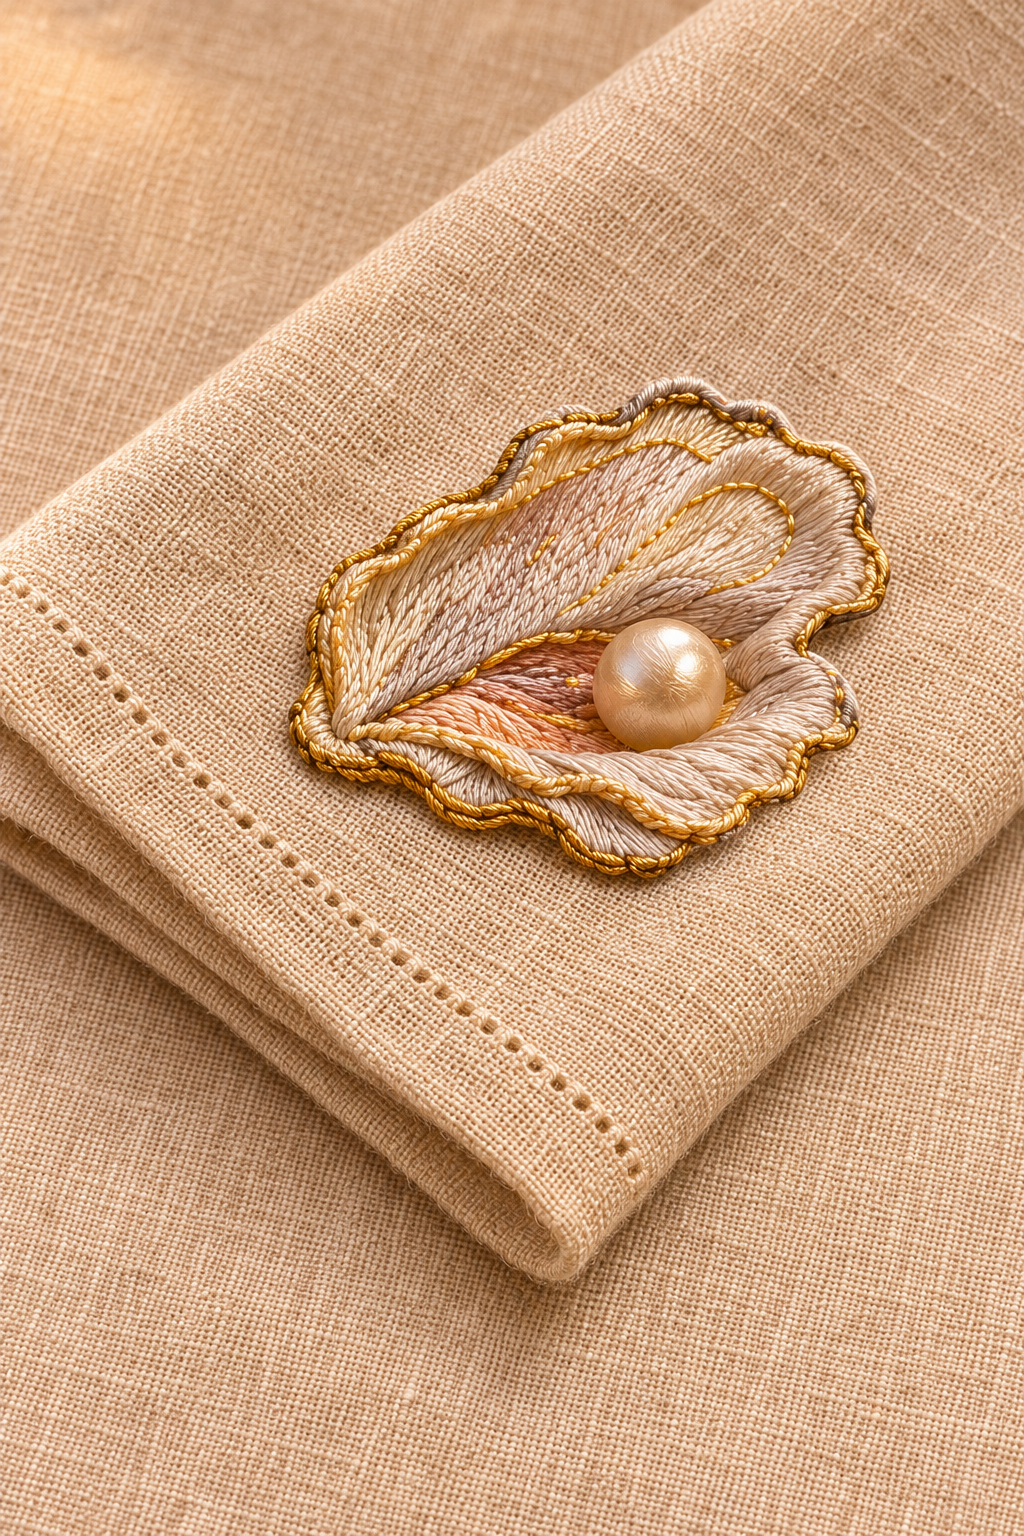
1.5 cm in from the napkin's edge, draw out 3–4 threads along the fabric; secure the threads on both sides of the drawn gap by hand with hemstitch, grouping them with a fine needle (4 threads at a time). The hemstitched edge adds elegance to the embroidered corner. If you would rather not do this, turn the edge under twice by 1 cm and stitch by machine.
PART 7 · CARE
– Wash the cloth and napkins inside out with a special shampoo.
– When ironing, lay a cloth over the embroidery and don't press hard.
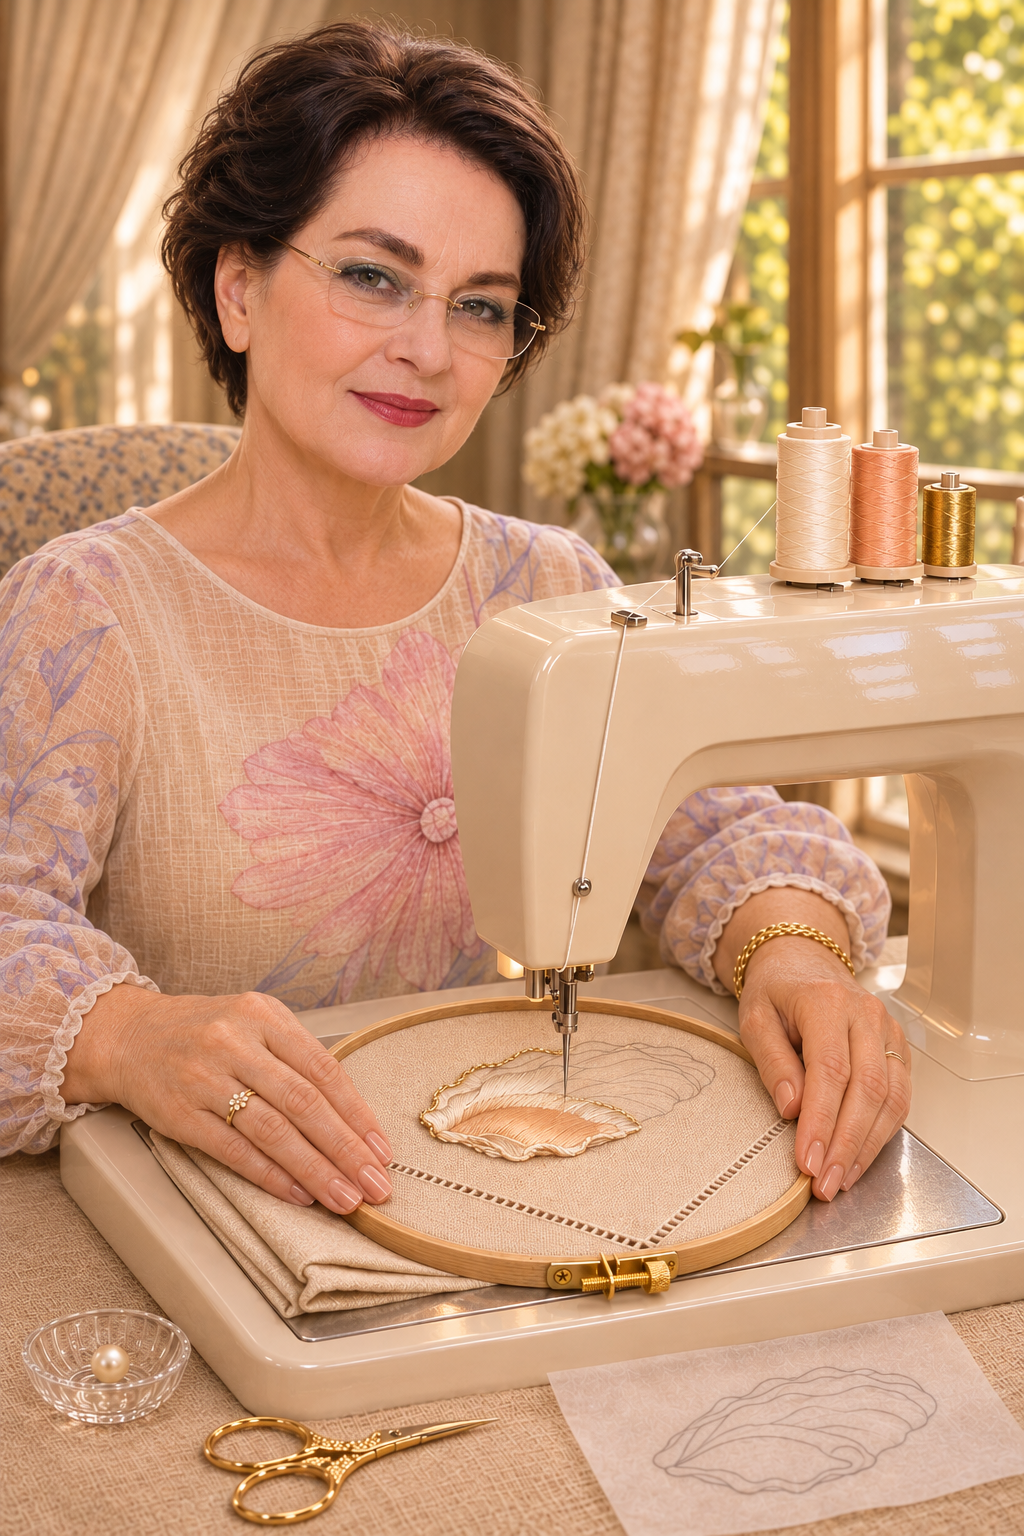
This month, add a sea to your table with your own hands. If you send us a photograph, we will be delighted to share it in Zarif Yaşam: contactf@zarifyasam.com